Install iOS SDK
The Amity Social Cloud SDK for iOS is delivered as a binary .xcframework file
Manual Installation
Drag
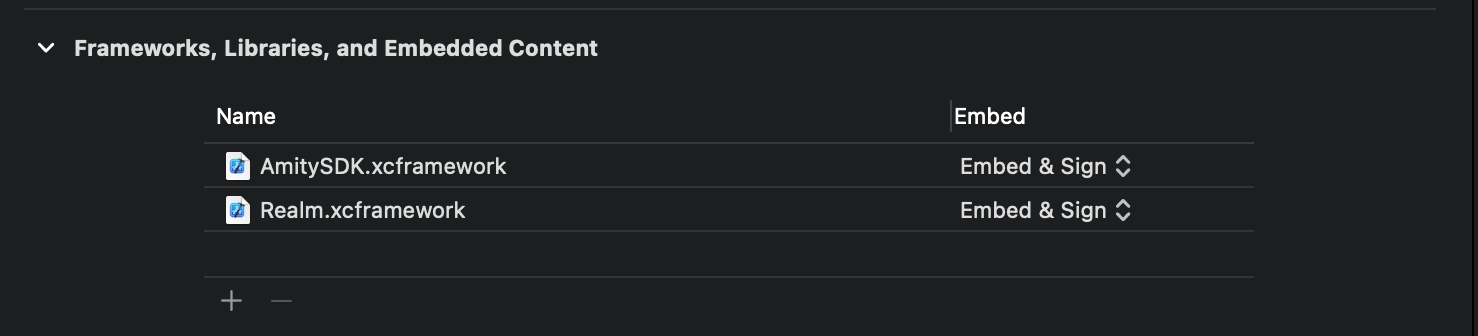
AmitySDK.xcframeworkandRealm.xcframeworkto your project.Make sure that
Copy items if neededis selected and click Finish.Also switch the Embed section as
Embed & Sign
The correct setup should look like this.
You need to turn Rosetta mode on when using AmitySDK with arm64 simulator. To force the application to use Apple Rosetta environment with an Apple silicon Mac, refer to this page for the instructions.
Using Dependency Manager
AmitySDK supports installation via dependency managers.
SwiftPM
Cocoapods
Carthage
SwiftPM Installation
To integrate AmitySDK into your project via SwiftPM, please follow the instruction below.
Enter the repository URL to search the package, and choose to install AmitySDK.
If you selected "Up to Next Major Version" option for the Dependency Rule, you need to manually add the version.
Carthage Installation
Carthage is a decentralized dependency manager that builds your dependencies and provides you with binary frameworks. To integrate the Amity Social Cloud SDK, add the following line of code to your Cartfile.
Cocoapods Installation:
To integrate the Amity Social Cloud SDK into your Xcode project using CocoaPods, specify the following lines of code in your Podfile:
This installs the latest version of SDK. To get more info about our latest release, please look into changelog section. We support cocoapod installation of our sdk above version 5.1.0. The minimum deployment target platform for iOS is 12.0.
If there are any issues during installation steps, clean cocoapods cache and try again. To clear cache please go to ~/Library/Caches/Cocoapods and remove `AmitySDK` related folders/files.
If this doesn't work, please do visit the Cocoapods Github repo for further resolutions.
AmitySDK already includes our UIKit. Don’t install the UIKit separately if you have already installed the SDK.
Additional Steps for Amity Video
Amity Video requires the AmitySDK as dependencies. First, ensure you have installed the AmitySDK as per the instructions above.
To use live video broadcast:
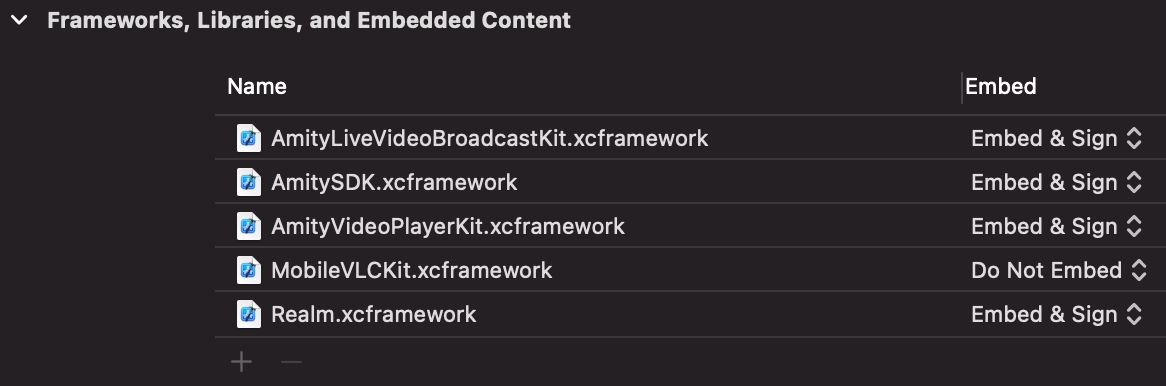
Import
AmityLiveVideoBroadcastKit.xcframeworkto your project.
To use live video player:
Import
AmityVideoPlayerKit.xcframeworkto your projectDownload
MobileVLCKit.xcframework, and import to your project.
Switch each framework to Embed & Sign, except MobileVLCKit to Do Not Embed.
For the project that uses both live video broadcast and live video player, the correct setup should look like this.
To install Swift Packages for Amity Video, please follow the instructions below.
1. Install AmityVideoBroadcast
To use live video broadcast functionalities. Enter the repository URL to search the package, and choose to install AmityVideoBroadcast.
Try it in your code
2. Install AmityVideoPlayer
To use live video player functionalities. Enter the repository URL to search the package, and choose to install AmityVideoPlayer.
Try it in your code
If you selected "Up to Next Major Version" option for the Dependency Rule, you need to manually add the version.
Using AmitySDK with Objective C Code
Starting with v6.0.0, AmitySDK for iOS is written in Pure Swift. Although its in pure Swift, you can still use it in Objective-C projects by making Mixed-Language Project.
We recommend you to integrate AmitySDK for iOS swift directly into your Objective-C project and use Swift language to call the SDK interfaces.
Mixed Language Project:
To make a mixed language project, create Swift files with necessary interfaces/methods which in turn interacts with AmitySDK. These interfaces should be exposed with @objc or @objcMembers attributes. Reference: Swift Attributes
When you add new Swift file into your Objective-C project, Xcode automatically generates a bridging header file. This bridging header exposes your Swift code to Objective C code. For more information you can refer to this guide by Apple: Importing Swift into Objective-C
Last updated