Loading...
Loading...
Loading...
Loading...
Loading...
Loading...
Loading...
Loading...
Loading...
Loading...
Loading...
Loading...
Loading...
Loading...
Loading...
Loading...
Loading...
Loading...
Loading...
Loading...
Loading...
Loading...
Loading...
Loading...
Loading...
Loading...
Loading...
Loading...
Loading...
Loading...
Loading...
Loading...
Loading...
Loading...
Loading...
Loading...
Loading...
Loading...
Install: Homebrew using: /bin/bash -c “$(curl -fsSL
https://raw.githubusercontent.com/Homebrew/install/HEAD/install.sh)"
or see more instruction at https://brew.sh
Install: git-lfs using: brew install git-lfs
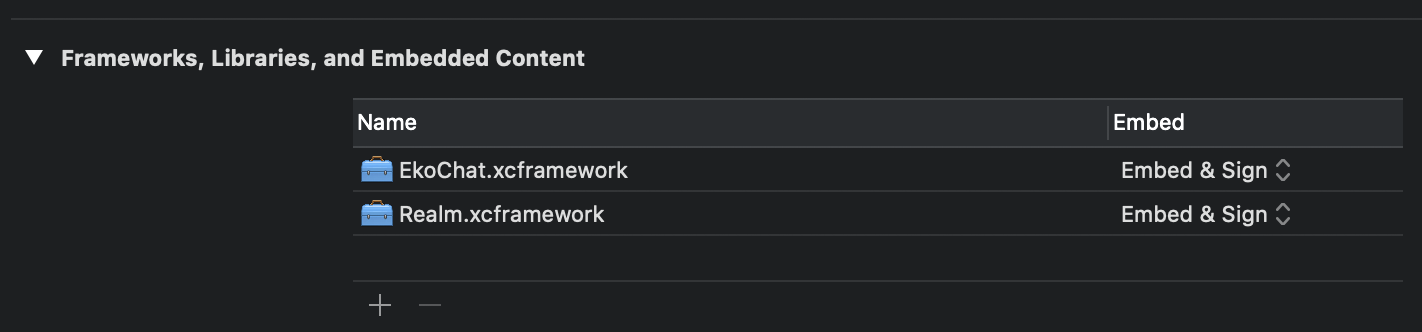
Starting from version 4.3, the use of the .xcframework will reduce the required number of installation steps and also support the use of same binary, even when the Xcode version changes. We also include an additional framework as a dependency: Realm.
In order to properly install the SDK, you must make sure to import and link both frameworks. XCFrameworks for both realm & our Chat SDK are bundled together for your convenience, this can be downloaded using the link below:
Drag EkoChat.xcframework and Realm.xcframework to your project's Embedded Binaries. Make sure that Copy items if needed is selected and click Finish. Also switch the Embed section as Embed & Sign.
Carthage is a decentralised dependency manager that builds your dependencies and provides you with binary frameworks. To integrate the Amity Chat SDK, add the following line of code to your Cartfile.
To integrate the Amity Chat SDK into your Xcode project using CocoaPods, specify the following line of code in your Podfile:
Please check if you have git-lfs installed and clear cocoapod cache before running install again
To clear cache please go to ~/Library/Caches/Cocoapods/ and remove Amity SDK folder - you should be able to run a clean install afterward
If this doesn't work, please do visit the cocoapod Github repo for further resolutions.
Here are the steps to migrate from the previous version of our SDK to the new .xcframework
Remove and unlink EkoChat.framework and Realm.framework from your project.
Remove custom Run Script Phase that is required for the version prior to v4.3. strip-frameworks.sh is no longer required, since .xcframework automatically handles the fat binary issue.
Copy and link EkoChat.xcframework and Realm.xcframework to your project. And set Embed & Sign.
Plug in this module to enable social features such as Feeds, Groups, Profiles, Content Posts, and Social Media Type Interactions
Foster a sense of belonging among your community and make your app a safe place for your users to connect and interact with others.
Build and nurture vibrant communities where users can exchange and connect
First, you will need to create the community by using EkoCommunityCreationDataBuilder instance. The mandatory property is displayName. You can set other properties as per your necessities.
In the case where you only want to fetch a community's data without joining, you can use the getCommunity(withId:) method:
There are methods to obtain communities that will only meet certain specific criterias:
the keyword parameter allows you to filter communities based on the community displayName
the filter parameter let you filter communities based on the logged in user membership status
the categoryId parameters let you filter communities based on community categories
the sortBy parameters let you filter communities based on the order that the communities were created or based on alphabetical order
the includeDeleted parameters let you specify if you want to include deleted communities in your query
If you want to fetch all communities, you can pass the keyword as nil.
Community Repository also provides a way to fetch trending communities or recommended communities. getTrendingCommunities method fetches trending communities whereas getRecommendedCommunities method fetches recommended communities.
SDK provides the builder class EkoCommunityUpdateDataBuilder which allows you to set properties that you want to update. Then you can use updateCommunity method in EkoCommunityRepository to update the community.
You can also delete the community by using deleteCommunity(_:) method.
Note. By default, only the community's original creator or administrators can update/delete the community.
You can get a list of community members through EkoCommunityParticipation class. It exposes getMemberships method which accepts filter and sortBy parameters.
Same class provides addUsers(_:) and removeUsers(_:) which can be used to add or remove user from the community.
EkoCommunityModeration class provides a way to moderate the community by banning or unbanning users. banUsers(_:) method accepts array of user ids to ban and unbanUsers(_:) accepts array of user ids to unban. You can also add/remove roles using addRole(_:) and removeRole(_:) method.
addRole(_:)andremoveRole(_:)does not create new roles but assign and remove existing roles from given user.
The EkoCommunityRepository will also be able to manage community categories. When communities are put into a category, you will be able to sort and filter each of the communities in that category. You can access the categories for any communities through categories property in each EkoCommunity object.
Note: Categories can only be created and updated from Amity Social Cloud Console.
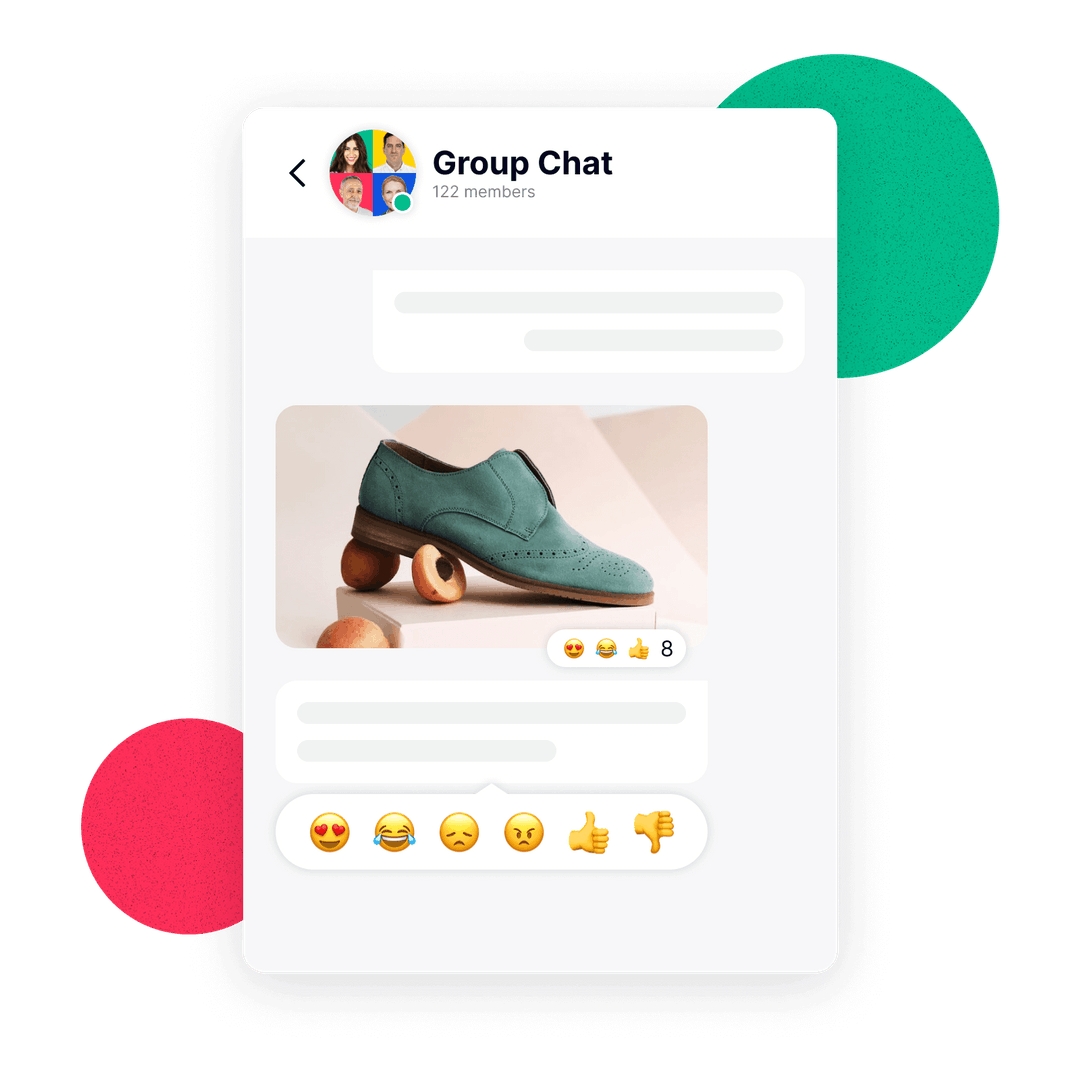
Let users react to messages, posts, and comments, which are visible to others.
Reactions are the interactions that user can perform with message, post or comment. The interactions can be anything such as like, dislike, love etc. It's up to the client to determine the type of reactions. EkoReactionRepository class provides convenient method to add, remove, and query reactions for any content. Currently reactions are supported for Posts, Messages & Comments.
You can fetch detailed information about reactions and the user who reacted to the post. EkoReactionRepository class provides two methods which gets detailed information about reactions to the post. Each information is provided though EkoReaction object.
You can fetch information about particular reaction name through getReactions method. This method requires reactionName, contentId and referenceType as a parameter and provide you with collections of EkoReaction. contentId as the reference id for Post, Message or Comment.
You can also fetch information about all the reactions through getAllReactions method. This method requires only postId as a parameter and provide all reactions for particular message, post or comment.
You can add any number of reactions to the given post. EkoReactionRepository provides addReaction method which accepts reaction name. Reaction name is case sensitive i.e "like" & "Like" are two different reactions.
You can remove any reactions added to the post. EkoReactionRepository provides removeReaction method which removes reaction name. Reaction name is case sensitive in this case too.
In iOS, LiveObjects are represented by the EkoObject and EkoCollection classes. EkoObject represents live updates on one model, while EkoCollection represents live updates on a collection of models.
Observing live changes to any EkoObject can be done via a simple observe block:
In this example the block observes the data of the currently authenticated user and prints out the displayName. The observe block can be called multiple times throughout the lifetime of the application (as long as its associated EkoNotificationToken is retained in memory):
If the requested object data is stored locally on the device, the block will be called immediately with the local version of the data (this can be verified this through the EkoObject property dataStatus).
In parallel, a network request for the latest version of the data is fired, once the network returns the data, the observe block will be called again with the updated data.
Any future changes to the data (whenever the user changes its displayName on another device, for example) can trigger additional callbacks.
Any UI update logic can be performed within the observe blocks, which will always be called in the main thread: this way, you can ensure that your UI displays the most up-to-date version of the state at all times.
In case you'd like to operate exclusively with fresh data, without using the potientially out-of-date local data, you can make sure to do so by reading the
EkoObjectdataStatusproperty, which reflects the status of the callback data, and check that its value is set to fresh.You can also use the
EkoObjectloadingStatusproperty to determine the current state of network operations being performed by the LiveObject. This is useful for any UI element that needs to communicate the loading state.
The EkoNotificationToken is a token that is used to control the lifecycle of a LiveObject. The observeWithBlock callback will be triggered only if the notificationToken is retained in memory: once it is released, the observe block will no longer be called, and its memory will be automatically released. Hold a strong reference to any EkoNotificationToken whose block you would like still to be called.
Beside the
observeWithBlockmethod, aobserveOnceWithBlockmethod is also available, which will trigger its callback only once, regardless of thedataStatusof the callback and the associated token retainment (the token still needs to be retained to fire once).To stop receiving
observeWithBlockupdates, release the associatedEkoNotificationTokenor callinvalidatemethod on the token itself.
An EkoCollection instance is given for any queries that return a list of objects. EkoCollection has the same change observation interface as EkoObject, but contains a few other helper methods around data access that allows better integration with collection views like UITableView.
Unlike most databases, EkoCollection does not return all data in an array. Instead, data are fetched one-by-one using the objectAtIndex: method. This allows the framework to store most of the actual result on disk, and load them in memory only when absoutely necessary. Additionally, the objectAtIndex: API fits perfectly into UITableView's tableView:cellForRowAtIndexPath:. Together with the count property, a typical tableView integration looks like this:
EkoCollection offers both a nextPage and previousPage methods which will trigger a local cache lookup, a network call, and multiple LiveObject updates once new data is returned. After the method call is successful, the number of records returned by EkoCollection will be increased by the additional number of new records. For the typical use case of infinite scroll, you can call nextPage directly in the scroll view delegate method:
Lastly, if there is a need to shrink the list of models exposed back to original first page, when passing the EkoCollection object to a new view for example, you can do so by calling resetPage into the collection itself.
Here's an overview of how you can get started integrating comments into your applications
Each comment is identified by a unique commentId, which is an immutable string. When creating a new comment, you do not need to specify your own commentId; you can leave it to Amity to generate one. We also provide optimistic updates on each comment. You will need to send a referenceId otherwise known as a postId , in the latest version. You need to use EkoCommentRepository before starting any activity with comments, such as editing an operation and/or flagging a comment.
There are 2 methods in EkoCommentRepository to note, one makes a comment as well as getting a collection of comments. They all return a LiveObject with the complete comment model.
Comment management methods are contained in a EkoCommentRepository class. Before being able to call any comment method, you must initialise a repository instance using the EkoClient instance you created earlier during setup:
EkoCommentRepository provides one convenient method to create comment. You can provide referenceId, parentId and text while creating a comment. parentId is optional parameters and useful for replying a comment. The concept is similar to the EkoMessage you can reply a message object with a parentId. For now, only text data will be supported in the creation method.
The code above creates a comment and prints out the commentId once it has been successfully created. It first instantiates the EkoCommentRepository, a class that contain all comment related methods. Then it calls createComment: to obtain the LiveObject and observe it in order to obtain the final comment model.
The
EkoNotificationTokenreturned by theobserveOnceWithBlock:is saved inself.commentToken, a strongly referenced property. This is needed in order to prevent the observe block to be released.The
parentparameter increateComment:is optional.The
referenceIdparameter increateComment:is a mandatory and will be only supportEkoPostidentifier.
The EkoCommentRepository provides method to get the query. The channelsForFilter(_:) and commentsWithReferenceId(_:) are the methods to return the LiveCollection of all the matching comments available. Like other LiveObjects, the collection return will help automatically update and notify you on any comment modifications (e.g. new comment, deleted comment, modified comment, flagged comment).
You can order the comments in descending order (i.e latest comment first). In this case you will have to call
previousPage()method to fetch more comments. Please look into the method documentation for more details.
You can also fetch the latest single comment using getLatestComment method. This method returns the Live Object which you can observe.
For any editing operation either update or delete a comment you can use EkoCommentEditor. EkoCommentEditor instantiate by using the selected commentId and the client. They have 2 methods which are editText:withCompletion: and deleteWithCompletion:
For flagging operation either update or delete a comment you can use EkoCommentFlagger. EkoCommentFlagger instantiate by using the selected commentId and the client. They have 3 methods which are flagWithCompletion:, unflagWithCompletion: and isFlagByMeWithCompletion:
EkoComment object includes information about the reactions for that post. Use myReactions property to get list of your reactions to the post. Usereactions property to get list of all reactions to the post and reactionsCount provides the total count of reactions on that post.
To add or remove reaction, please refer to documentation for EkoReactionRepository.
Here's an overview of posts and how you can get started with integrating them into your applications
A feed is made up of a collection of posts. Users will be able to generate different types of posts as well as to react and comment on posts. SDK provides different builder classes to create each type of post. First, you need to build the post by using one of the builder classes. Then use the instance of EkoFeedRepository to actually create the post. createPost method requires instance of builder, targetId and targetType. TargetType is an enum with two cases, which is user and community.
If you want to create a post on a particular user's feed, you can provide the id of that user for targetId parameter. If you want to create a post on your own feed, set targetId to nil. If you want to post on particular community, then targetType would be community.
Use EkoTextPostBuilder to create text post.
In order to create image post, images must be uploaded first. SDK provides a convenient class EkoFileRepository to handle upload and download images. The repository contains uploadImages method which takes array of UIImage and provides you with array of EkoImageData for successful upload and array of UIImage for failed uploads.
A post can have maximum 10 images.
Now to create the image post. We can build the post first by using EkoImagePostBuilder. Then use the same createPost method in EkoFeedRepository to create image post.
File post follows the same order as image post. First you upload the file using EkoFileRepository, build the post using EkoFilePostBuilder and then finally create the post. To upload the file, EkoFileRepository provides uploadFile method which takes an instance of UploadableFile. It provides you with EkoFileData for successful upload and Error for failed upload. Its okay to call this method inside a loop if you want to upload multiple files.
Note: A post can consist of either a list of images or a list of files but not both.
Now to create file post, we build the post using EkoFilePostBuilder.
You can also query for each individual post based on its postId. EkoFeedRepository provides a convenient method getPostForPostId(_:) which returns EkoObject<EkoPost>.
The observe block can get called multiple times depending upon where the post is being fetched from. We can check the dataStatus property for liveObject to see if the post is being fetched from server or locally. Please refer to Accessing Post Information section.
EkoFeedRepository provides another convenient method to delete post. To delete the post, you just need the post id. If you are deleting child post, you need to pass the parent id too. If it is the parent post, just pass nil.
Note: Only the post owner or an admin will be able to delete a post.
Each post is represented by EkoPost instance. Each instance of EkoPost holds several information such as data, reactions, comments, metadata, child posts etc. For text based post, you can access to the actual data for the post through data property.
Post with images or files follow Parent - Child relationship. Each images or files uploaded will be a separate child post. Any text that you set while creating image/file post will act as a Parent post. Parent post contains childrenPosts property which gives you array of EkoPost.
You can access data for child post through same data property for child post. Alternatively, you can also access more details about uploaded files and images through getFileInfo() or getImageInfo() method.
Let's consider our post contains some text & 1 image. This means parent post would be a text post and its child post will be an image post. Here is how we can access it.
You can add any number of reactions to the given post. EkoReactionRepository provides addReaction method which accepts reaction name. Reaction name is case sensitive i.e "like" & "Like" are two different reactions.
You can remove any reactions added to the post. EkoReactionRepository provides removeReaction method which removes reaction name. Reaction name is case sensitive in this case too.
You can flag a post as inappropriate using EkoPostFlaggerinstance.
EkoPost object provides few latest comments through latestComments property. To fetch all comments for the post, please refer to documentation for Comments.
Error objects can be returned to you via LiveObjects, callbacks, or clientErrorDelegate. All the errors returned by the SDK come in form of an NSError with domain Eko. The possible error codes are listed in a public EkoErrorCode enum: each case is named after its error and they're pretty self explanatory.
UnauthorizedError: 400100
ItemNotFound: 400400
BadRequestError: 400000
Conflict: 400900
ForbiddenError: 400300
PermissionDenied: 400301
UserIsMuted: 400302
ChannelIsMuted: 400303
UserIsBanned: 400304
NumberOfMemberExceed: 400305
ExemptFromBan: 400306
MaxRepetitionExceed: 400307
BanWordFound: 400308
LinkNotAllowed: 400309
GlobalBanError: 400312
BusinessError: 500000
Unknown: 800000
InvalidParameter: 800110
MalformedData: 800130
ErrorQueryInProgress: 800170
ConnectionError: 800210
When an error is returned as a result of an action from your side (e.g. trying to join a channel), the action is considered completed and the SDK will not execute any additional logic.
The EkoClient includes a clientErrorDelegate property that can be set to an error handler delegate class on your application. This error delegate gives you a chance to be notified of errors that can potentially break the functionality of the SDK. The SDK logic is usually robust enough to automatically handle most errors, as such, only unrecoverable errors are exposed through this delegate (for example, if the login session was invalidated).
We recommend you to always handle these errors in a production app by gracefully disabling messaging functionality in the event of an error.
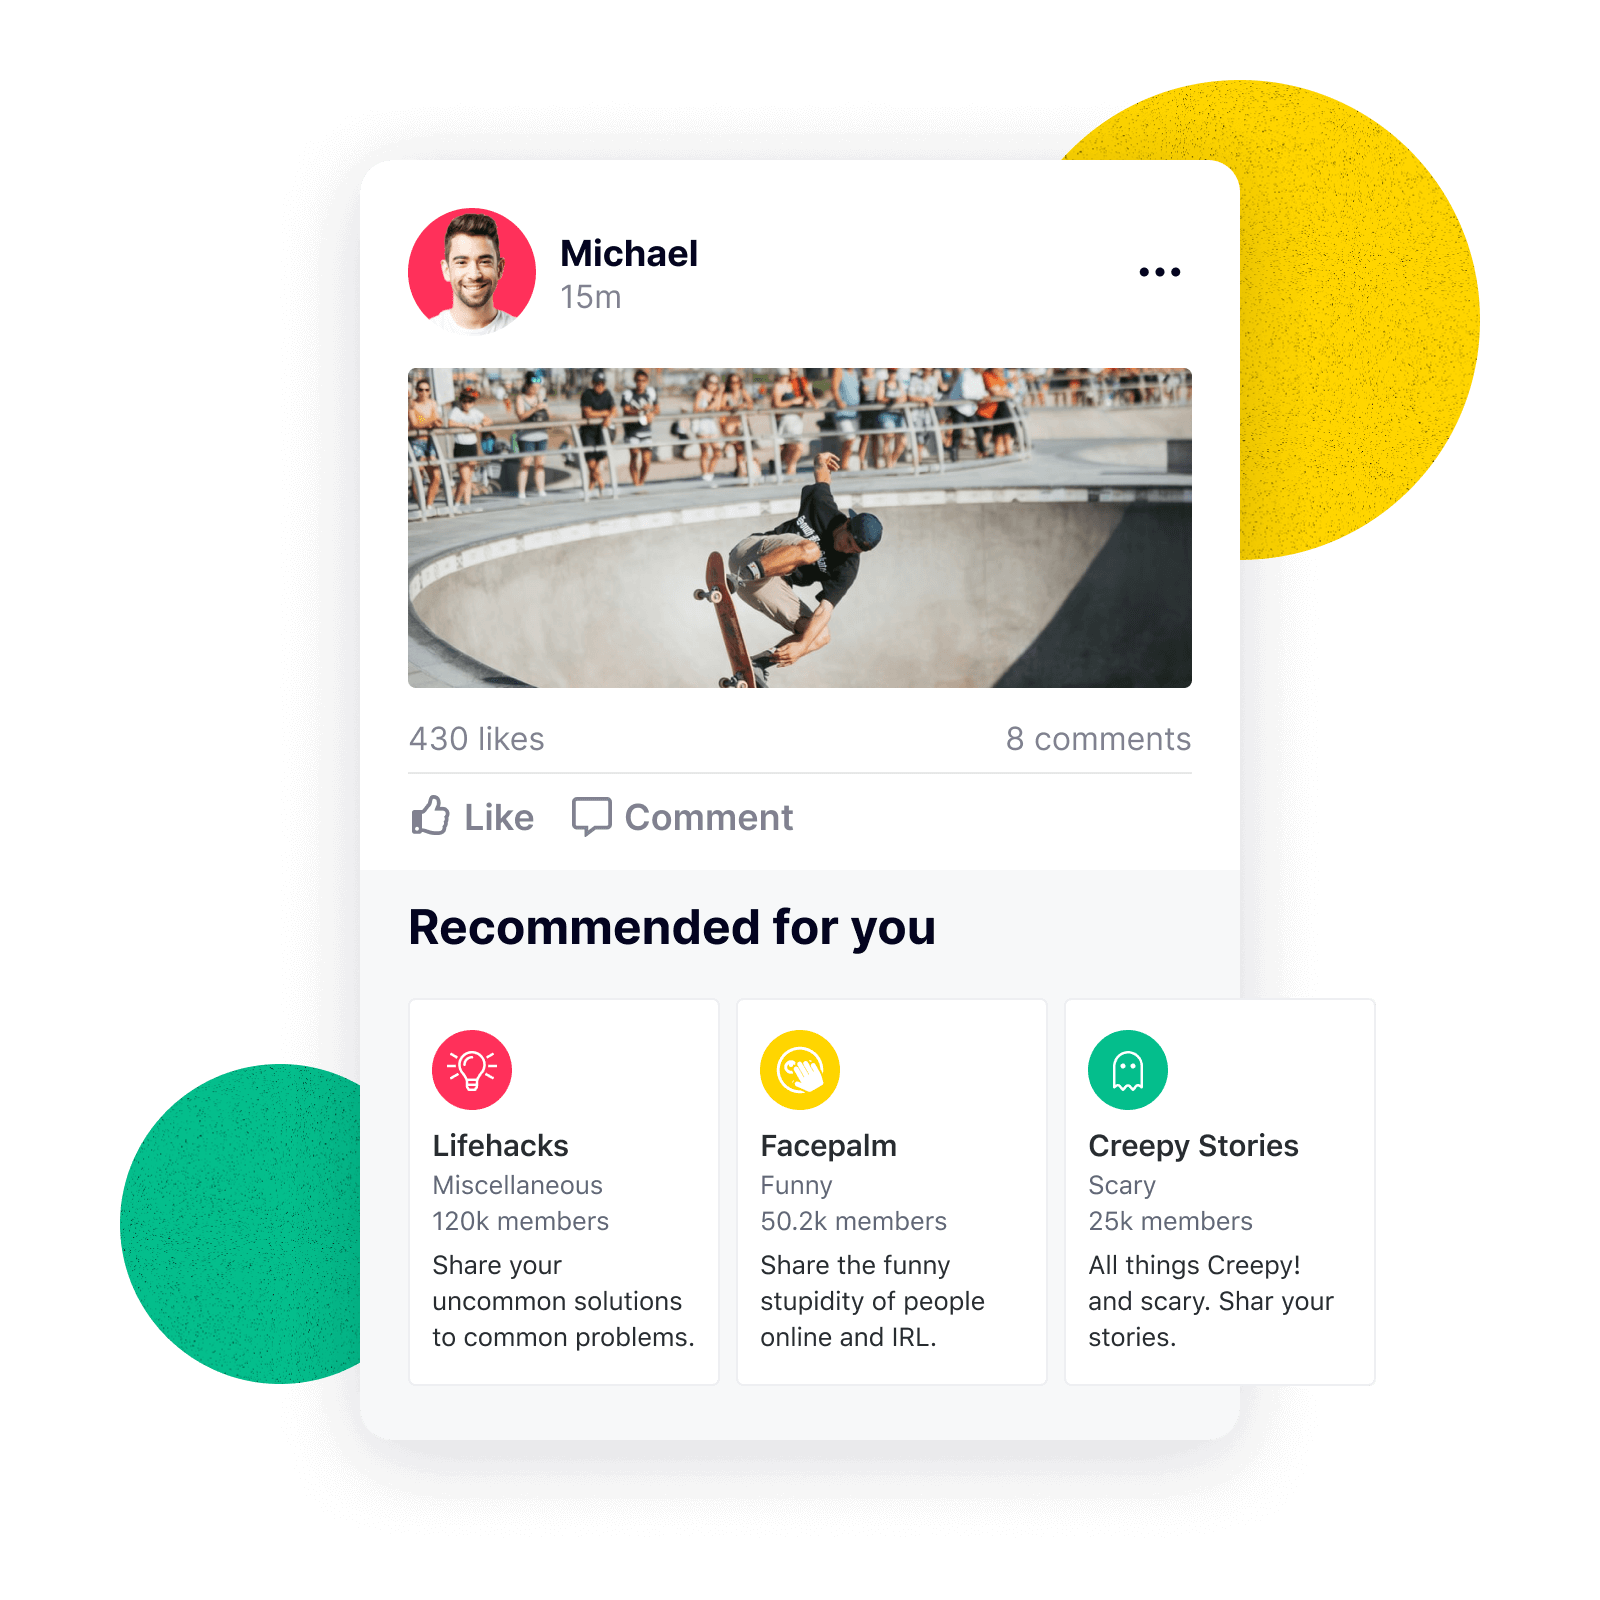
Let your users showcase their unique personality right in their timelines
Feed is a great way for users to get relevant updates, communicate and express themselves via algorithmically ranked content.
Each feed consists of a collection of posts. Users will be able to create posts on any groups that they are a member of and any user that they can find.
There is also a global feed which is an aggregate of all the posts in a user's feed.
Feed management methods are all contained in EkoFeedRepository class.
Querying for feed fetches your posts in your own feed or other user's feed. You can also sort the posts by lastCreated or firstCreated timestamp. EkoUserFeedSortOption enum provides both sort options which you can provide as argument while fetching feed.
EkoFeedRepository class exposes two convenient methods getMyFeedSortedBy(_:) and getUserFeed(_:) to query for your own feed and other user's feed respectively. getUserFeed(_:) method requires an additional parameter userId.
There is a quick easy method to get your own feed:
Live Collection for feed provides max 20 posts per each page. You can easily fetch more posts by using nextPage() method from the same live collection.
You can get any group's feed by calling the method below with the communityId. Fetching more posts for Group Feed is same as User Feed.
You can retrieve your global feed by calling the following method.
Fetching more posts in global feed is same as User Feed.
Before using the Social SDK, you will need to create a new SDK instance with your API key. Please find your account API key via the Admin Panel. If you have trouble finding this, you can send our support team an email at developer@amity.co
In order to use any Social SDK feature, you must first register the current device with an userId. A registered device will be tied to the registered userId until the device is either proactively unregistered, or until the device has been inactive for over 90 days. A registered device will receive all the events messages belonging to the tied user.
An optional displayName can be provided, which will be used in standard push notifications (related to user's actions, such as when the new message is sent).
The
displayNameis set only on the first time the device is registered, please follow your platforms necessary directions if you would like to rename this to something else.
When the user logs out, you should explicitly unregister the user from the SDK as well. This prevents the current device from receiving unnecessary and/or restricted data.
Each user can be registered, at the same time, to an unlimited number of devices. Amity's Social SDK will automatically synchronize the user data across all registered devices. We will also automatically unregister any device that has not been connected to the server for more than 90 days.
When a device is unregistered due to inactivity, the SDK data on the device will be reset. You will need to re-register this device in order to connect to server again.
If you have any logic or UI around the connection status, you can observe the connectionStatus property on the EkoClient instance.
Since the SDK automatically manages the network connection and queue up any requests in cases of bad connection, there should be little need to attach additional logic to this status. However the user may want to know the exact network status to determine if their actions will be performed in real-time, therefore this status is exposed.
Our Sample app adopts an open source framework that highlights how Amity Social Cloud SDK's can be implemented into application builds pragmatically.
With real life use-cases, we guide you through ways you can get started with building stellar applications for yourself and your clients and their users
Download the iOS sample app
Introduce a completion parameter to registerDeviceWithUserId(:_) in EkoClient
None
Fix issue where categories property of community is updated incorrectly when fetching list of community categories.
None
Fix crash when setting up custom avatar for in EkoClient class.
None
N/A
Add EkoUserNotification and EkoUserNotificationModule class for supporting user notification settings
Add EkoCommunityNotification and EkoCommunityNotificationEvent class for supporting community notification settings
Add notificationManagerForCommunityId: method in EkoCommunityRepository class to provide EkoCommunityNotificationsManager
Add EkoRoleFilter and EkoRoleFilterType; class and enum for defining what roles would be affected by notification setting
Add displayName option in EkoCommunitySortOption enum to sort list of communities alphabetically.
Fix issue where dataStatus for EkoObject was not reflected correctly.
Add EkoCommunityFeedSortOption enum.
sortBy parameter type is changed to EkoCommunityFeedSortOption for getCommunityFeed: method in EkoFeedRepository class.
Add EkoCommunityMembershipSortOption enum.
sortBy parameter type is changed to EkoCommunityMembershipSortOption for getMemberships: method in EkoCommunityParticipation class.
Note: If you have been using enum in short form i.e
.displayName, these breaking changes would not cause any effect.
Fix issue where post was not getting removed from global feed when deleted
Fix issue where non members could search for private communities locally
Comment in error state can be hard deleted by deleteComment() api in EkoCommentEditor
Fix issue where deleted comment was being shown from cache
SDK is now distributed as xcframework. .dsym files are also included inside the framework. Please refer to installation docs for more info
Add roles properties in EkoCommunityMembership class
Add hasPermission: methods in EkoClient to check permissions for current user.
New feature: Community. Please refer to Community documentation
New feature: Feed. Please refer to documentation for Feed.
Fix issue where setRoles, setUserMetaData and setDisplayName was not working.
Fix issue where user object in EkoComment was null.
Remove displayName property from EkoComment. You can access display name through user property.
Add EkoCommentRepository, EkoCommentEditor and EkoCommentFlagger class. Complete documentations are on Comment section.
Add EkoReactionRepository model support reactions.
Add EkoReaction class to provide reaction info.
Add UI to add & fetch comments
Add UI for reaction on comments
No need to add zlib integration anymore
Support Cocoapod and Carthage installation
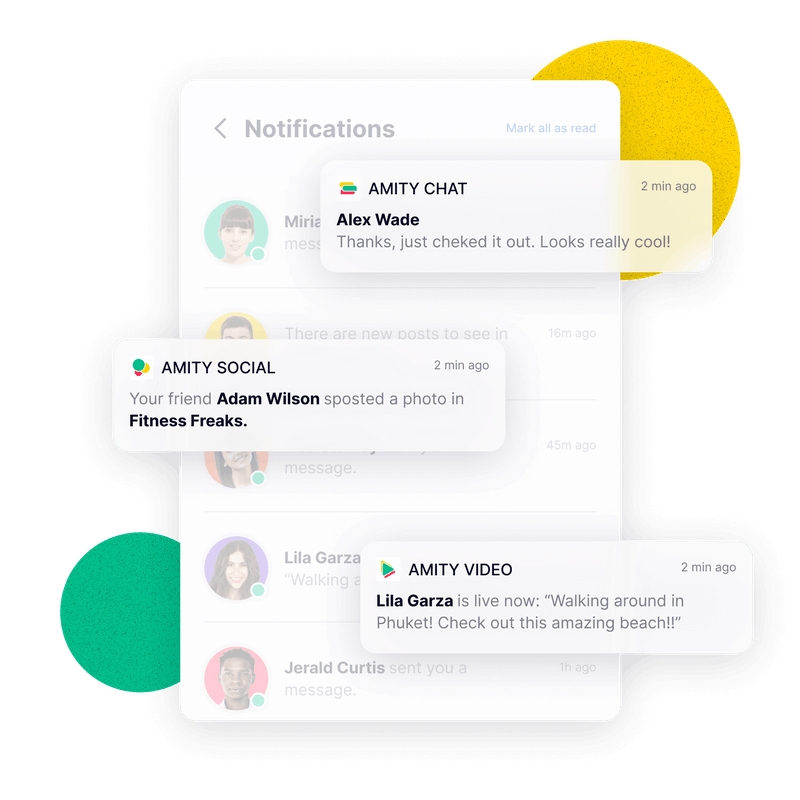
Ensure that your users don’t miss important content from each other.
With this solution the notifications will be triggered and delivered to your users directly by Amity's servers. There's nothing that the iOS client has to do in order to display the notification to your users. Amity's servers will prepare for you a notification that can be directly displayed to the user as and when it's received.
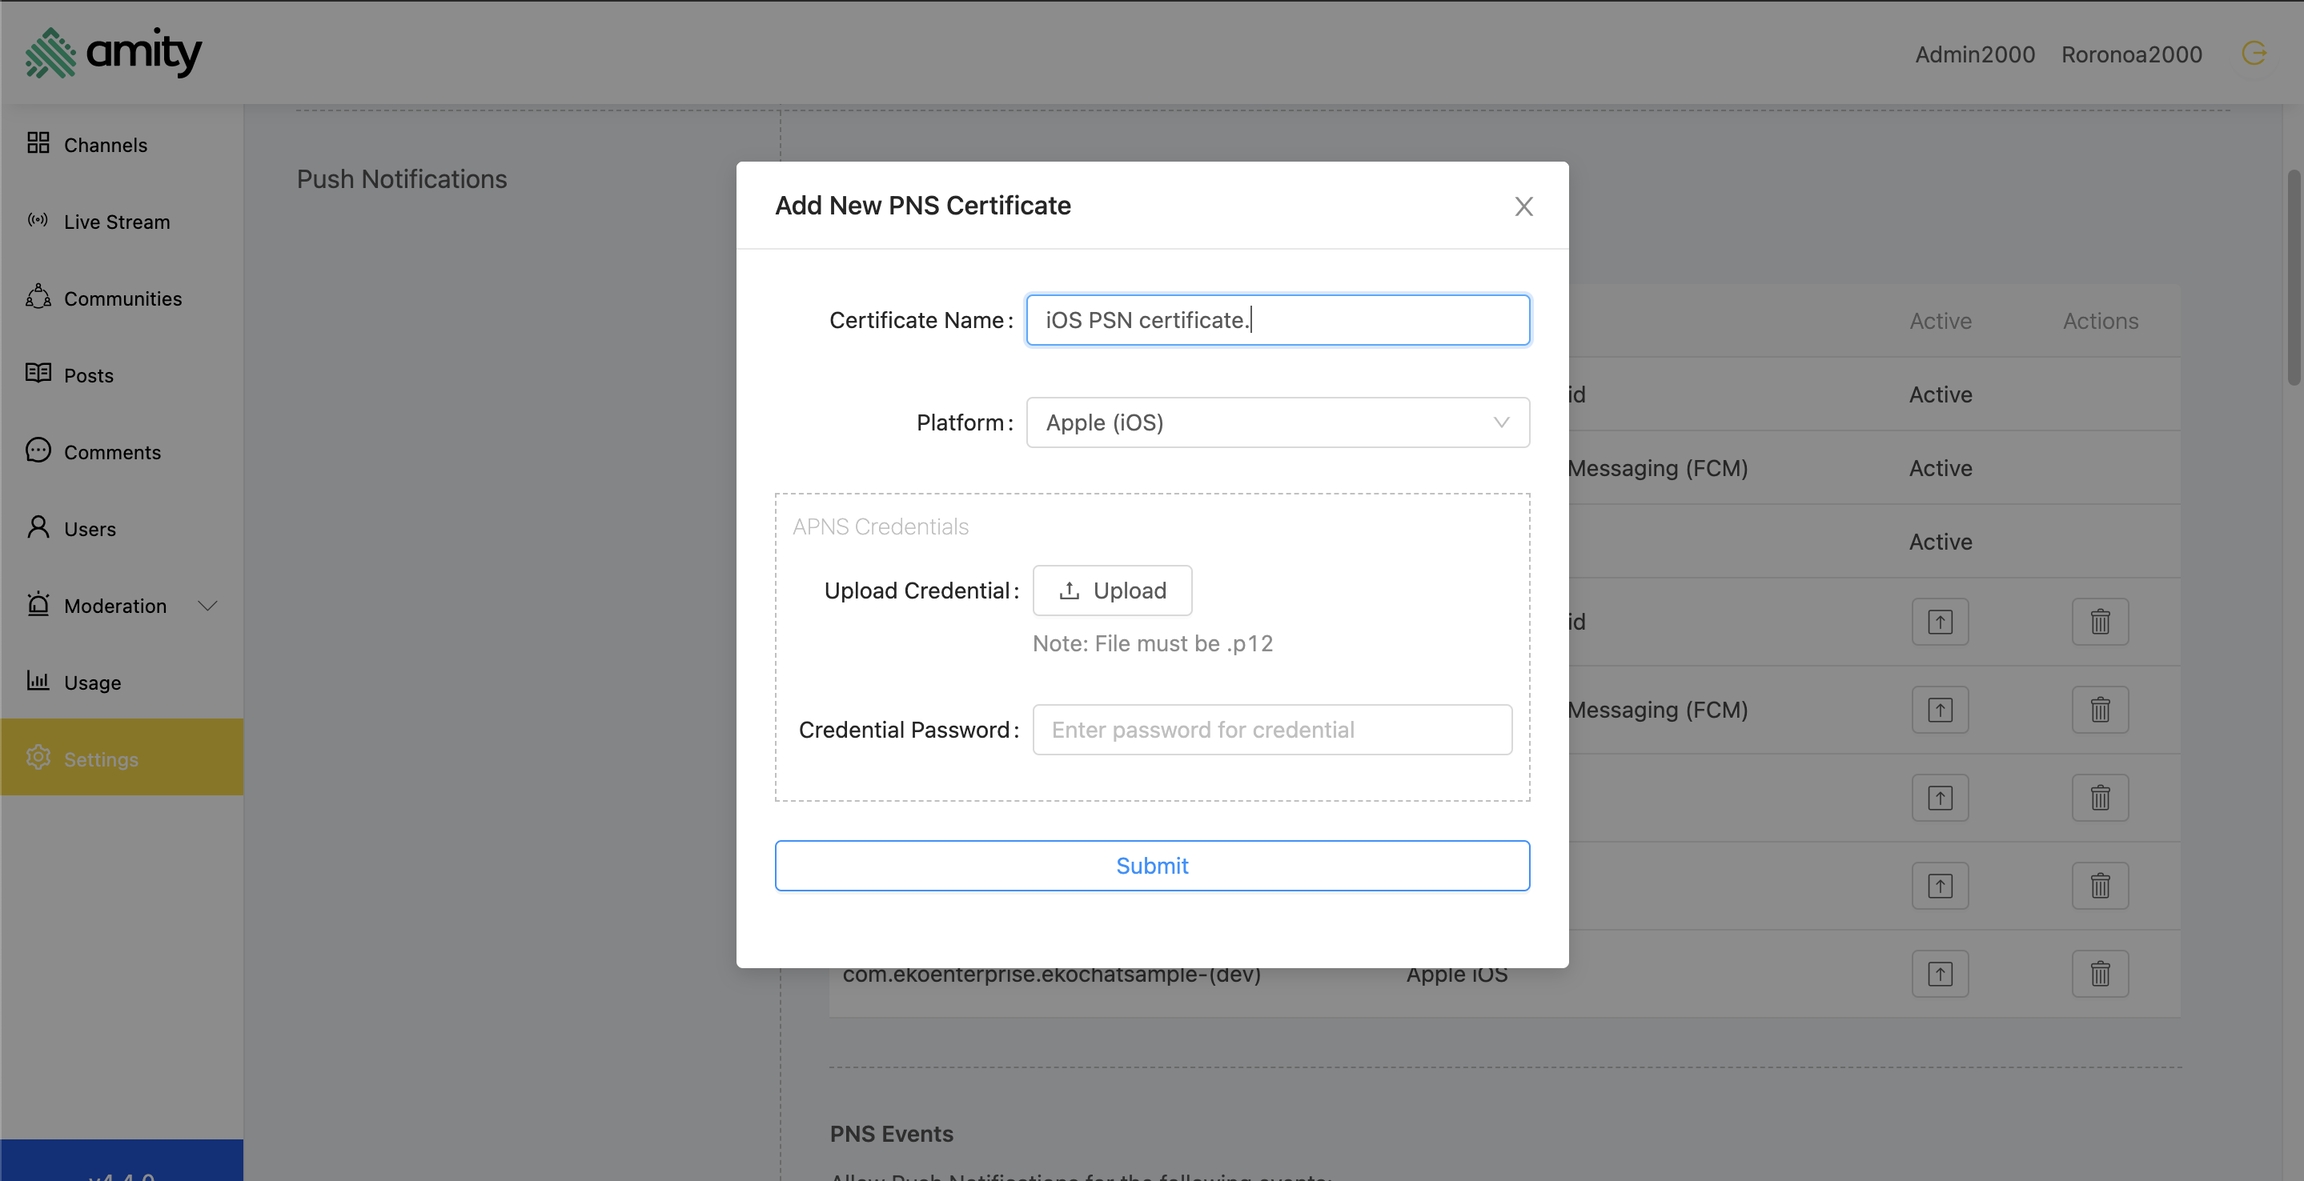
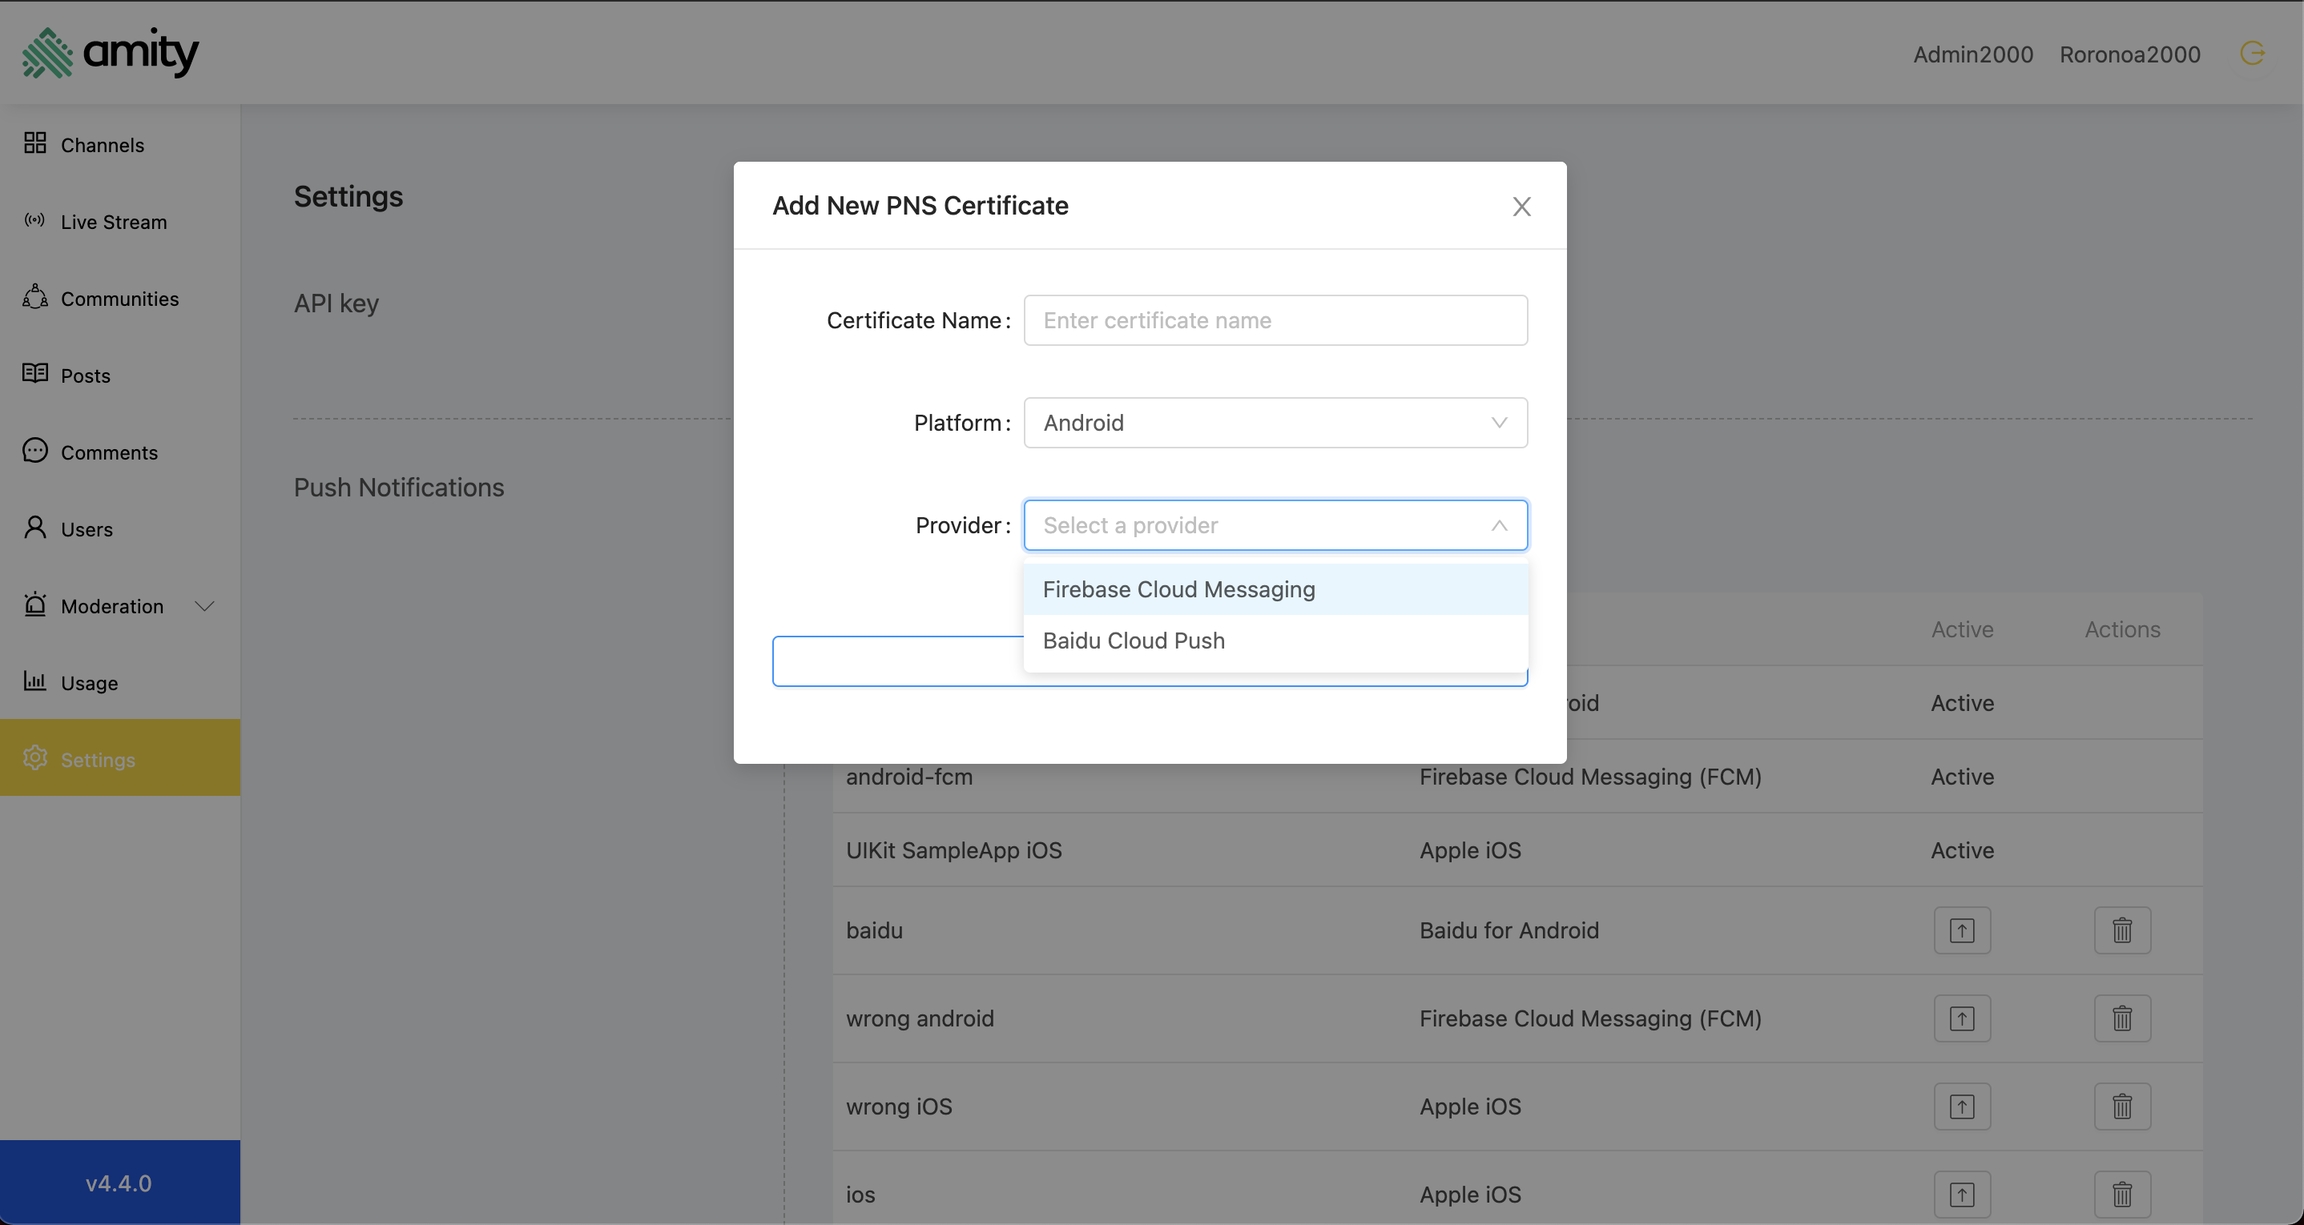
In order for Amity's server to start sending push notification to the iOS client , You need to prepare the iOS PSN certification and uploaded to Amity system via Amity Admin panel.
A new push notification will be sent to a specific user when the following event happens IN a community user a member.
A new post has been created in the community user is a member.
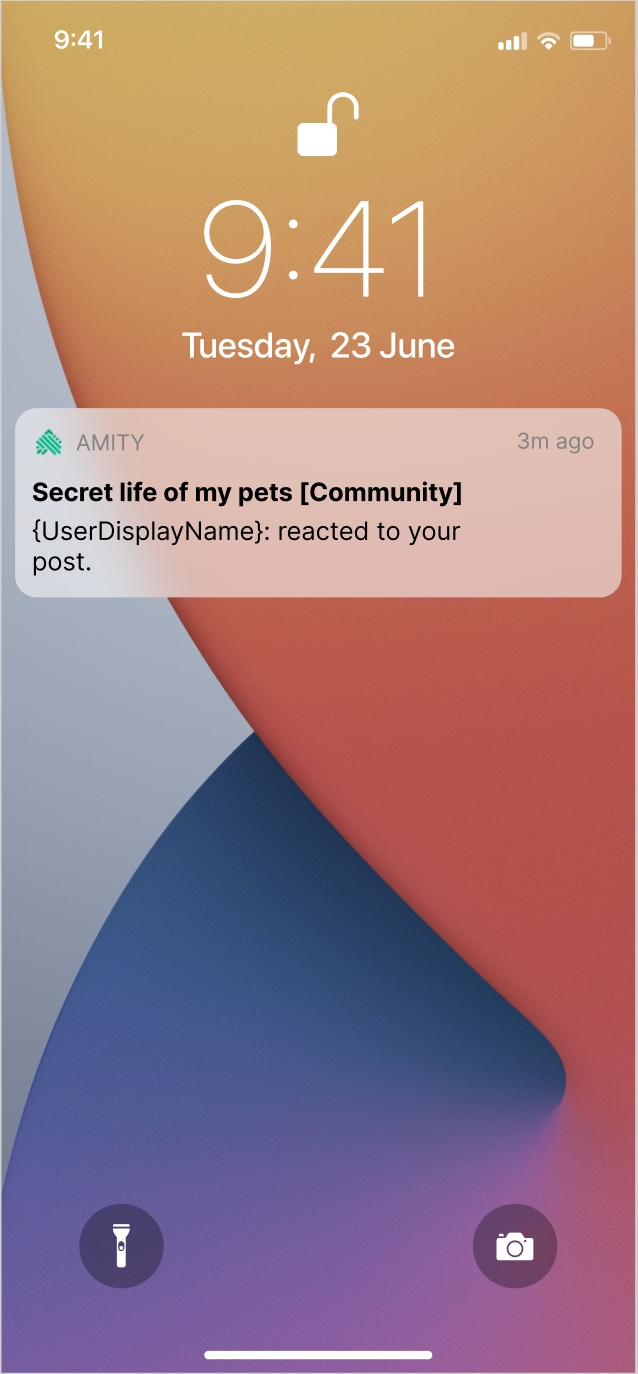
Post owner has been reacted by a user in the community
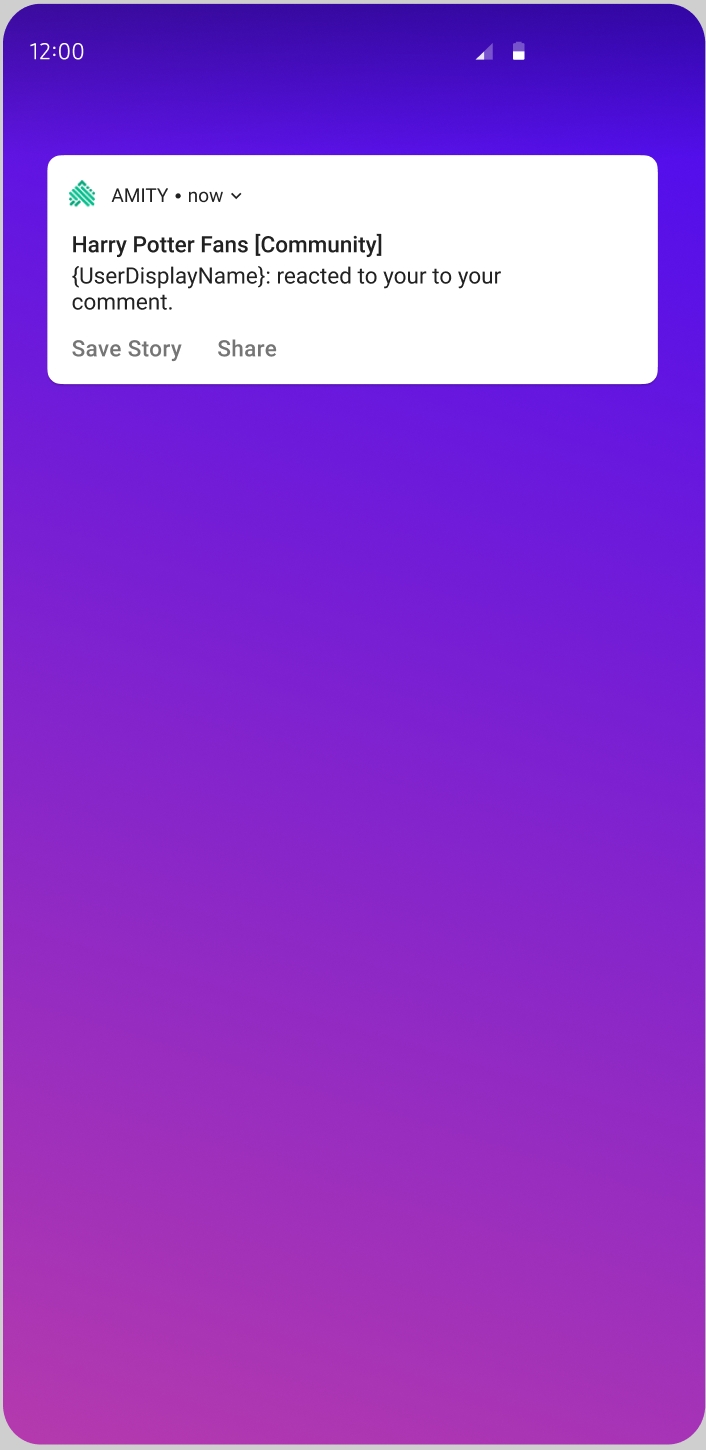
Post owner has new Comment created by a user in the community.
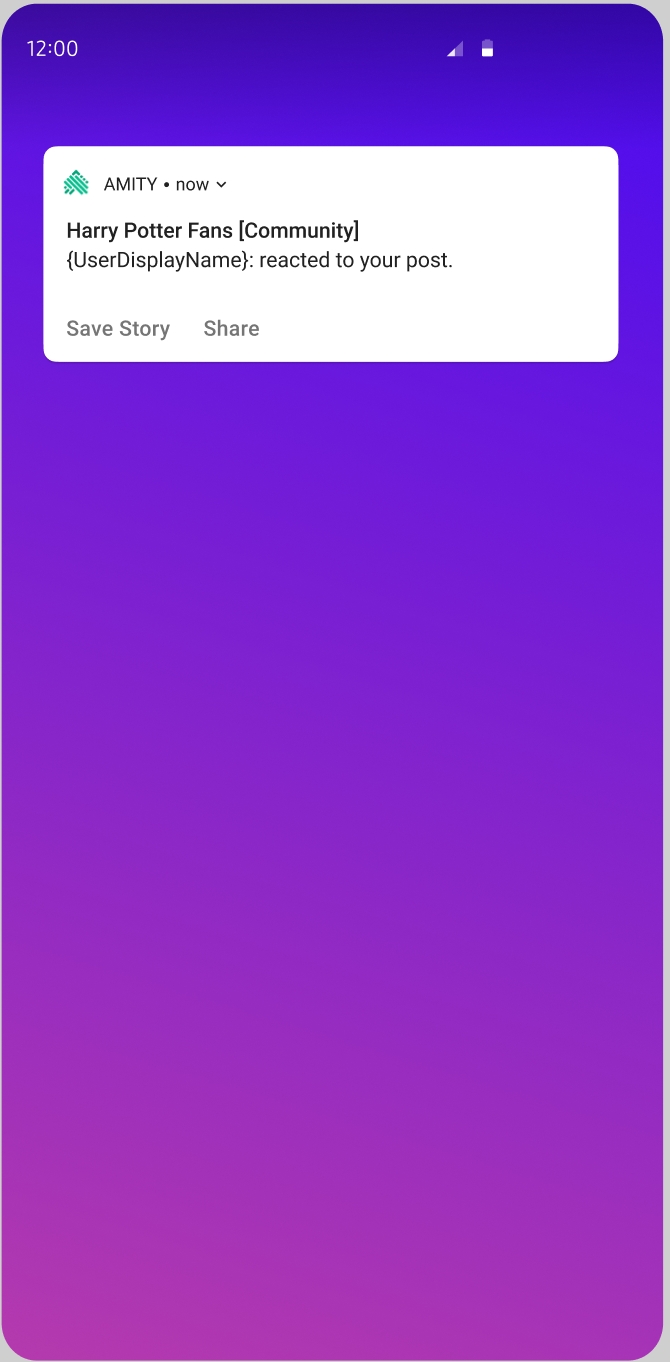
Comment or Reply owner has been reacted by a user in the community
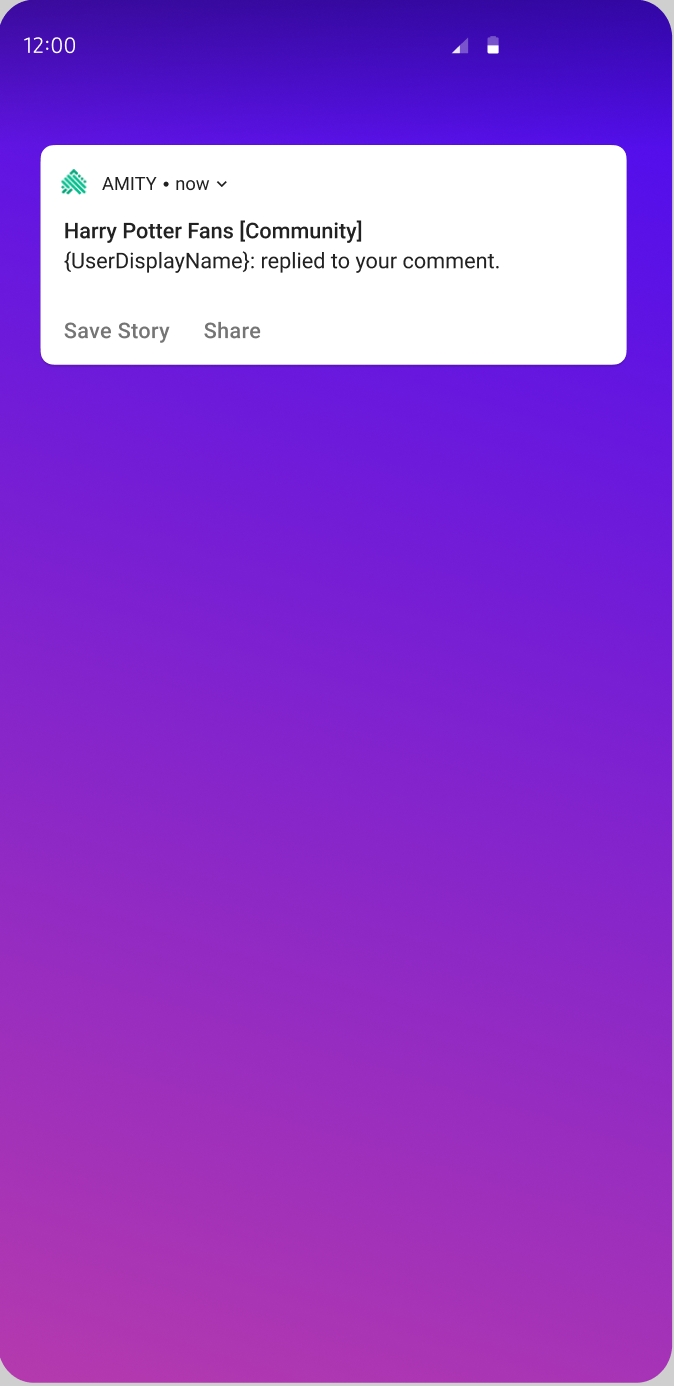
Comment owner has a new Reply created by a user in the community.
As Amity's servers are responsible for choosing the content of the push notification, you can expect your users to receive the following notifications for different kind of events:
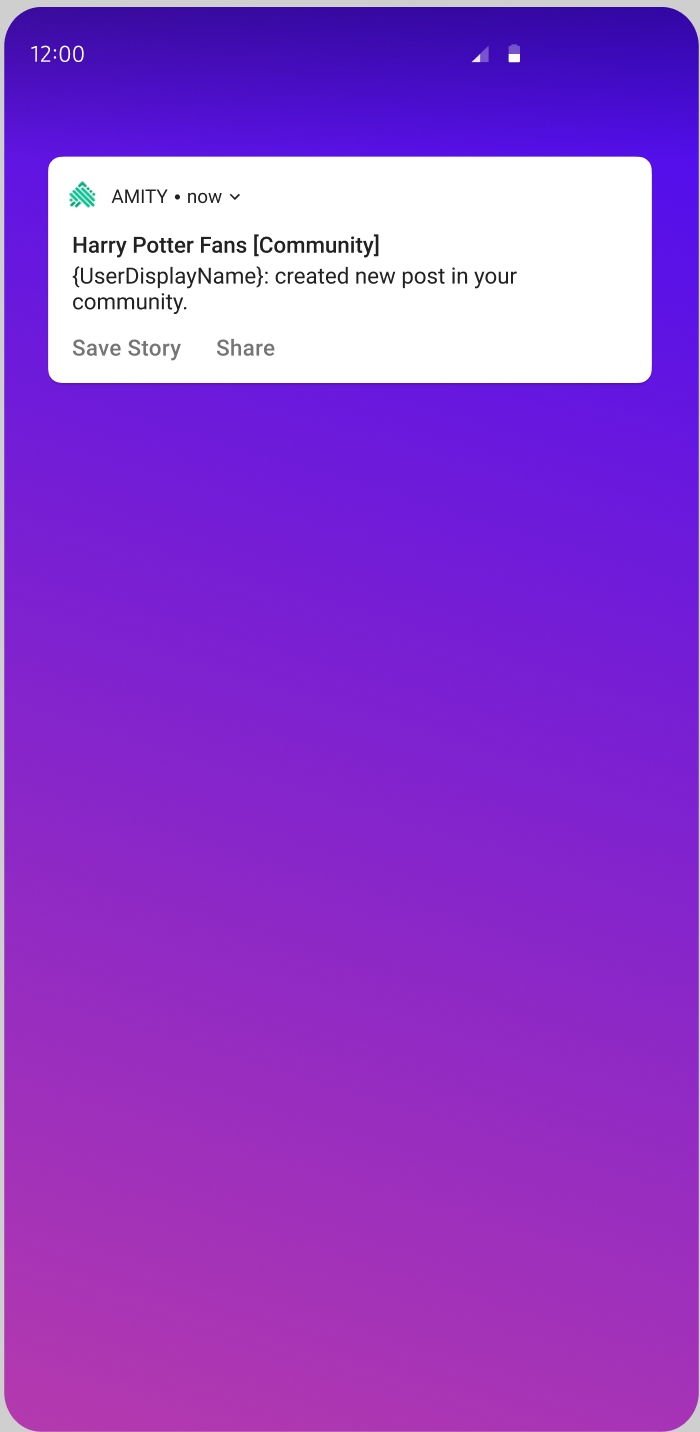
A new post has been created in the community user is a member.
Title : CommunityDisplayname
Body : userDisplayname created new post in your community.
Post owner has been reacted by a user in the community
Title : CommunityDisplayname
Body : userDisplayname reacted to your post
Post owner has new Comment created by a user in the community.
Title : CommunityDisplayname
Body : userDisplayname commented to your post
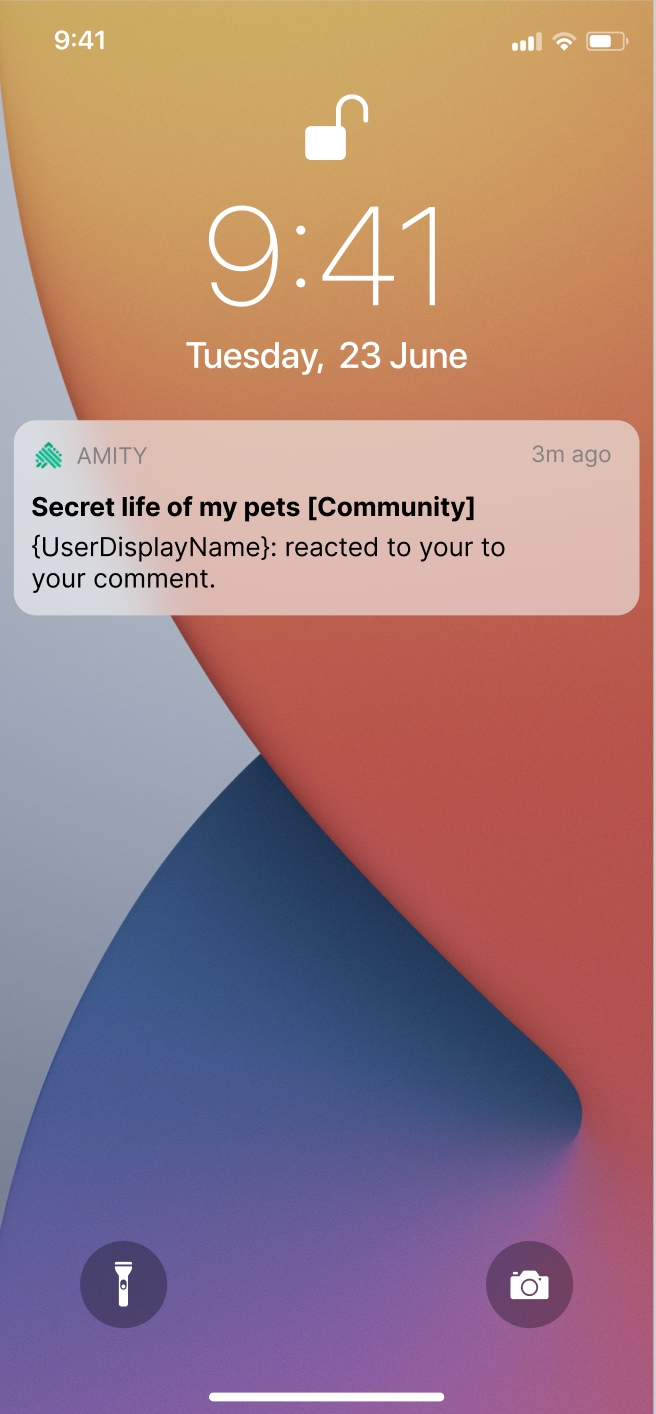
Comment or Reply owner has been reacted by a user in the community
Title : CommunityDisplayname
Body : userDisplayname react to your comment
Comment owner has a new Reply created by a user in the community.
Title : CommunityDisplayname
Body : userDisplayname replied to your comment
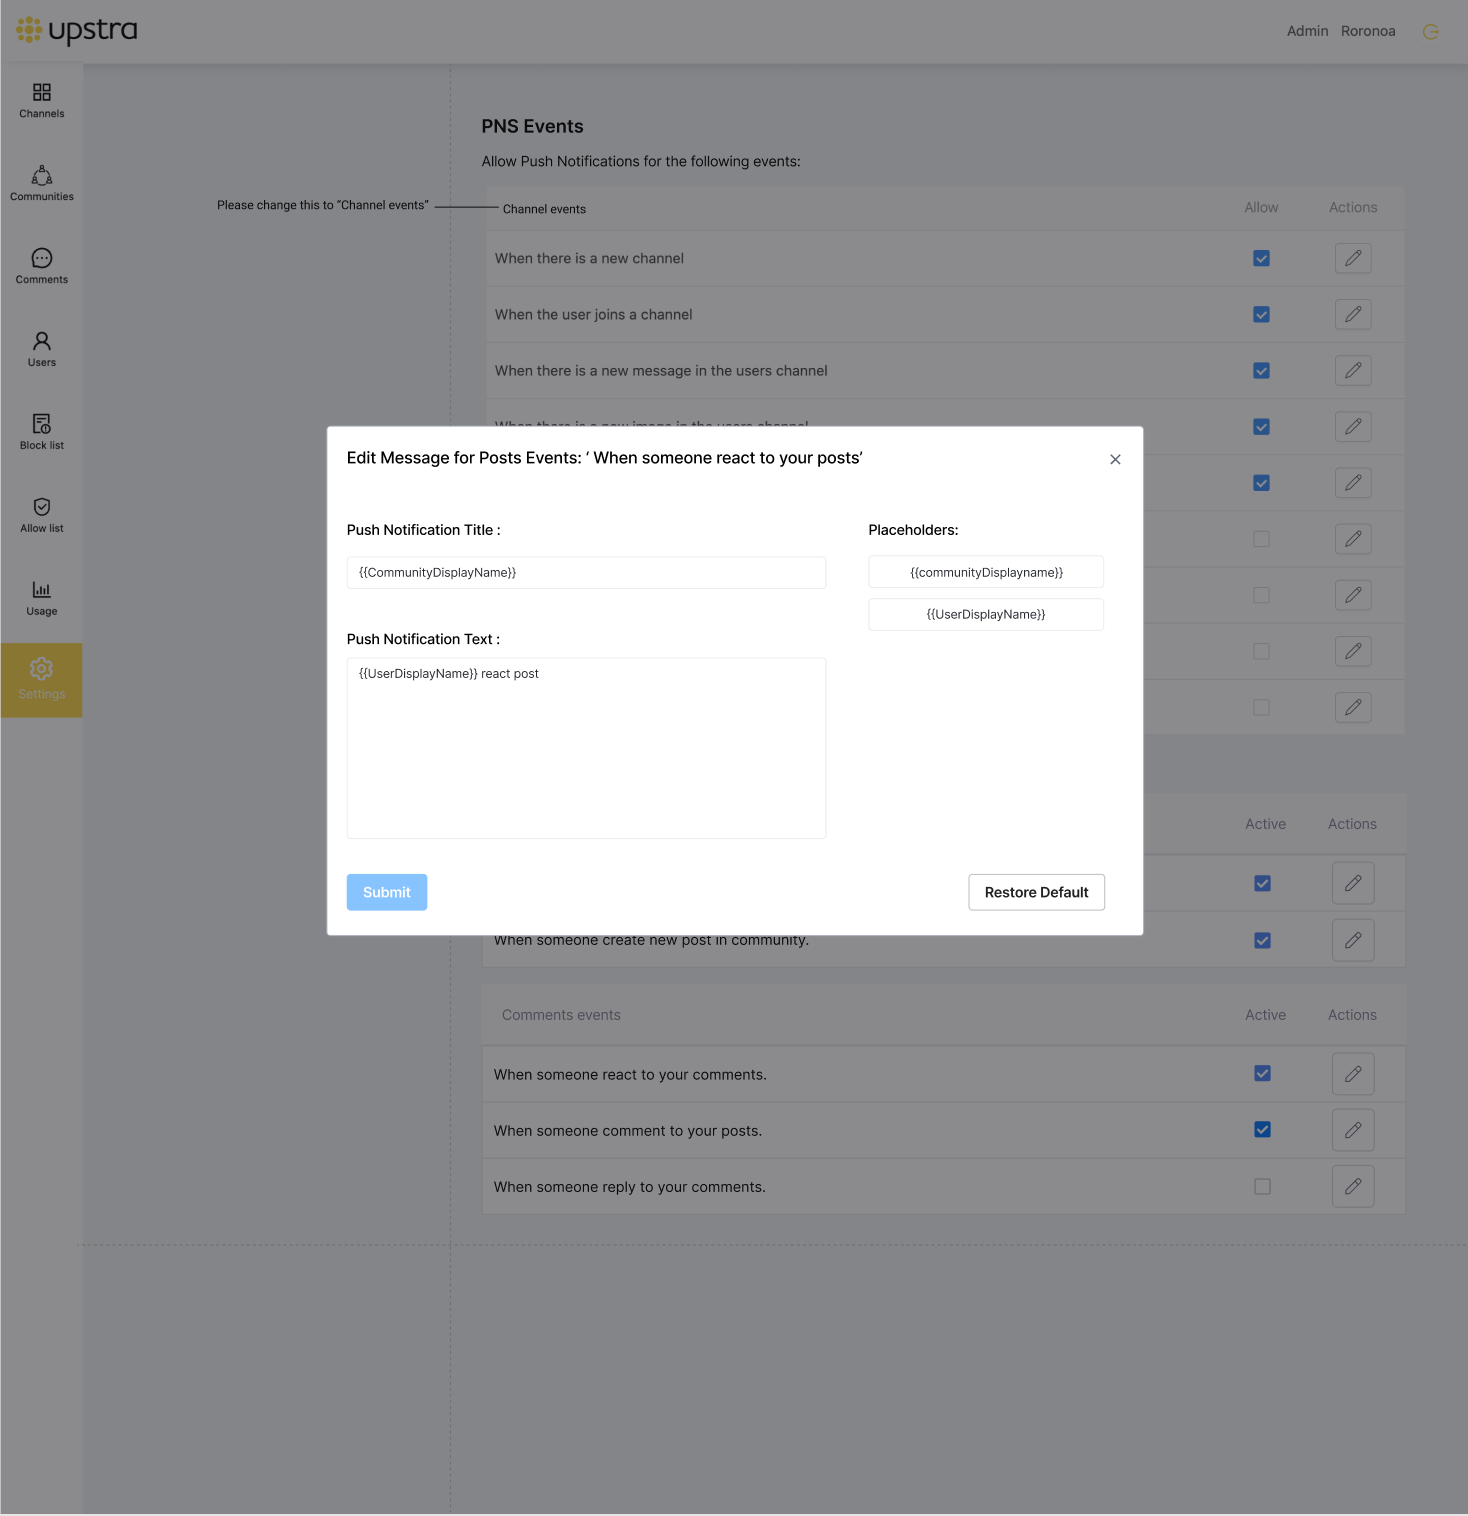
as default, all the event related to the Community feature has default context base on each event trigger, to customize the context for each event, you can access to Admin panel to do so.
Before start using push notification, a device token need to be set through registerDeviceForPushNotification(:_)
Request push notification authorization
Registering your app for push notification will require a registered EkoClient instance (necessary to know which user is associated with this device) and a push notification token.
Amity's Development Kit does not manage:
user-facing requests for push notifications and authorizations
the creation and refreshing of push notification tokens
It's up to your app to take those steps and pass the notification token to the SDK.
We recommend to observe the completion block outcome to assure of a successful registration.
If the device was previously registered with this or another user, the previous registration is invalidated as soon as this new request is received, which means that the device will always receive notifications of up to one user.
The SDK has three levels of notifications and in order for it to be sent, a notification has to pass throughout all three levels.
Network Level: (via Admin Panel) turning off notifications at this level effectively disable push notifications altogether for all of your customers.
User Level: (via client) A user can choose to enable/disable the notifications that it receives on the device (this is an absolute option: enable all or disable all). Please note that this setting is per user, not per device: regardless of which device sets this toggle, the new preference will take effect in all the devices where the user is logged in.
Community Level: (via client) A user can choose to enable/disable notifications for a specific community (where is member of). Again, this preference is per user, not per device.
please note that if the Network level has been disable , the event in the User level AND Community level will be disabled as well.
In order to get and set the user level push notifications preference, we use the object EkoUserNotificationsManager, obtained from the current EkoClient:
For Community preferences, we use the EkoCommunityNotificationsManager , obtained via an instance of EkoCommunityRepository:
Unlike the registration, unregistering for push does not require the EkoClient instance to be associated with any user, therefore you can unregister the device from receiving push notifications as soon as the EkoClient has been initial
The connectionStatus flag supports , use NSObject's observe methods to be notified whenever this status changes
Before using the Social SDK, you will need to create a new SDK instance with your API key. Please find your account API key via the Admin Panel. If you have trouble finding this, you can send our support team an email at developer@amity.co
In order to use any Social SDK feature, you must first register the current device with an userId. A registered device will be tied to the registered userId until the device is either proactively unregistered, or until the device has been inactive for over 90 days. A registered device will receive all the events messages belonging to the tied user.
An optional displayName can be provided, which will be used in standard push notifications (related to user's actions, such as when the new message is sent).
When the user logs out, you should explicitly unregister the user from the SDK as well. This prevents the current device from receiving unnecessary and/or restricted data.
Each user can be registered, at the same time, to an unlimited number of devices. Amity's Social SDK will automatically synchronize the user data across all registered devices. We will also automatically unregister any device that has not been connected to the server for more than 90 days.
When a device is unregistered due to inactivity, the SDK data on the device will be reset. You will need to re-register this device in order to connect to server again.
If you have any logic or UI around the connection status, you can observe the connectionStatus property on the EkoClient instance.
Since the SDK automatically manages the network connection and queue up any requests in cases of bad connection, there should be little need to attach additional logic to this status. However the user may want to know the exact network status to determine if their actions will be performed in real-time, therefore this status is exposed.
Our Sample app adopts an open source framework that highlights how Amity Social Cloud SDK's can be implemented into application builds pragmatically.
With real life use-cases, we guide you through ways you can get started with building stellar applications for yourself and your clients and their users
Download the Android sample app
Plug in this module to enable social features such as Feeds, Groups, Profiles, Content Posts, and Social Media Type Interactions
Foster a sense of belonging among your community and make your app a safe place for your users to connect and interact with others.
The Chat SDK for Android is delivered via maven repository
Add the Jitpack repository in your project level build.grade at the end of repositories:
Add the dependency in your module level build.grade:
To get started using the SDK, data binding is required as a mandatory dependency. You need to download the library from the Support Repository in the Android SDK manager. For more information, see Update the IDE and SDK Tools.
To configure your app to use data binding, enable the dataBinding build option in your build.gradle file in the app module, as shown in the following example:
Currently, Android does not support Live-Objects as such, we use a protocol that follows ReactiveX for Kotlin and Java related data streams.
Here's an overview of how you can get started integrating comments into your applications
Each comment is identified by a unique commentId, which is an immutable string. When creating a new comment, you do not need to specify your own commentId, and you can leave it to SDK to generate. We also provide optimistic update on each comment. You will need to send a referenceId which is a contentId for current supported version. You need to use EkoCommentRepository before starting any activity with comments, such as editing an operation and/or flagging a comment.
In the future we may support another
referenceTypeand will be available in creation method.
There are 2 main methods in EkoCommentRepository which is creating a comment as well as get a collection of comments. They all return a LiveCollection with the comment model.
Comment management methods are contained in EkoCommentRepository class. Before being able to call any comment method, you must initialise a repository instance using the EkoClient instance ,which you created on setup:
EkoCommentRepository provides createComment() method to create comment. You can provide referenceId, parentId and text while creating a comment. parentId is an optional parameter, useful for replying a comment. The concept is similar to the EkoMessage where you can reply a message object with a parentId. For now, only text data is supported in the creation method.
EkoCommentRepository provides getCommentCollection() method to query for comments. The query returns a LiveCollection of all the matching comments available.
To query for replies to a specific comment. You can pass the commentId as the parentIdparentId = commentId . To get parent level, pass parentId = null . Omitting parentId will get all comments on all levels.
Currently EkoComment has one data type TEXT. Other types are coming soon.
Comment editing options depend on EkoComment data type.
On EkoComment.Data.Text model, there is an edit() method that initiates text data editing chain. The replacing text can be passed to text() method.
To delete a comment, the delete() method is available on the EkoComment model.
On EkoCommentFlaggermodelflag() and unflag methods are available.
The info such as flagCount: Int and isFlaggedByMe: Boolean are also available in the EkoComment model via getFlagCount() and isFlaggedByMe() methods respectively.
EkoComment provides react() method to help instantiate EkoReactormodel.
In EkoReactormodeladdReaction() and removeReaction() methods are available.
EkoComment model provides info such as the reactions reactionCount: Int ,myReactions: List<String>, reactionMap: EkoReactionMapvia getReactionCount(), getMyReactions(), and getReactionMap() methods respectively.
Here's an overview of how you can get started integrating comments into your applications
When creating a new community, first instantiates the EkoCommunityRepository, a class that contain all community related methods. Then call createCommunity() to obtain the RxJava and observe it in order to obtain the final community model.
If you prefer create community with an avatar you can first upload image with EkoFileRepository then pass the obtained EkoImageto createCommunityAPI.
The joinCommunity() method will add the active user as a member of the channel.
This API can be called as many time as needed. If the community has already been joined, a "success" result will be returned, ie., going into doOnComplete{}block.
In the case where you only want to fetch a community data without joining, you can use the getCommunity(:id) method:
There are methods to obtain communities that only match specific criteria:
the withKeyword parameter let you filter communities based on the community displayName
the sortBy parameters let you filter communities based on the order that the communities were created or based on alphabetical order
the filter parameter let you filter communities based on the logged in user membership status
the categoryId parameters let you filter communities based on community categories
If you want to update a community, you can call the following:
Note. By default, only the community's original creator or administrators can update the community.
You can get a list of community members by calling the following method:
Note. By default of sortBy is LAST_CREATED so you can skip .sortBy in builder
also you can query community membership with userId by use getCommunityMembership(:userId) via EkoCommunityParticipation.
Creator of community can add and remove role of user via EkoCommunityModeration.
The EkoCommunityParticipation provides a list of members by role in the given community.
You can check your permission in community by sending EkoPermission enums to EkoClient.hasPermission(:ekoPermission) method.
The EkoCommunityRepository will also be able to manage community categories. When communities are put into a category, you will be able to sort and filter each of the communities in that category.
Note. Right now categories will only be creatable and updatable from the Amity Social Cloud Console.
This method provides the ability to obtain all the categories.
Note. By default of sortBy is NAME so you can skip .sortBy in builder
A feed is made up of a collection of posts. Users will be able to generate different types of posts as well as to react and comment on posts.
When you want to parse EkoImage object you can upload image uri or id by using EkoClient.newFileRepository() the following:
When you want to parse EkoFile object you can upload file uri or id by using EkoClient.newFileRepository() the following:
When creating a text post, call the following method:
Note. A post can consist of either a list of images or a list of files but not both.
You can use the getPost(:postId) method in order to get a single post:
Note. Only the post owner or an admin will be able to delete a post.
If you prefer to update post. You have to use EkoPost that you received for update post and check data type in the following:
You can add a reaction to a post by using EkoPost that you received and call the following method:
You can remove a reaction of a post by using EkoPost that you received and call the following method:
You can use EkoPost that you received to add a comment to a post by using our Comment feature:
You can use EkoPost that you received for reply a comment to a post by using our Comment feature:
You can use EkoPost that you received for flag a post as inappropriate by using the following method:
You can use EkoPost that you received to get status flag the following:
You can use EkoPost that you received for unflag a post the following method:
You can find out more information here;
Let users react to messages, posts, and comments, which are visible to others.
This functionality is not currently supported for Android but will be coming soon! We will update the relevant sections accordingly
Let users react to messages, posts, and comments, which are visible to others.
This functionality is not currently supported for Android but will be coming soon! We will update the relevant sections accordingly
With this solution the notifications will be triggered and delivered to your users directly by Amity's servers. There's nothing that the Android client has to do in order to display the notification to your users. Amity's servers will prepare for you a notification that can be directly displayed to the user as and when it's received.
In order for Amity's server to start sending push notification to the Android client , You need to prepare the Firebase certification (for the device that support by google push notification service) Or Baidu cloud Push certification(for the device not support by google service) and uploaded to Amity system via Amity Admin panel.
A new push notification will be sent to a specific user when the following event happens IN a community user a member.
A new post has been created in the community user is a member.
Post owner has been reacted by a user in the community
Post owner has new Comment created by a user in the community.
Comment or Reply owner has been reacted by a user in the community
Comment owner has a new Reply created by a user in the community.
As Amity's servers are responsible for choosing the content of the push notification, you can expect your users to receive the following notifications for different kind of events:
A new post has been created in the community user is a member.
Title : CommunityDisplayname
Body : userDisplayname created new post in your community.
Post owner has been reacted by a user in the community
Title : CommunityDisplayname
Body : userDisplayname reacted to your post
Post owner has new Comment created by a user in the community.
Title : CommunityDisplayname
Body : userDisplayname commented to your post
Comment or Reply owner has been reacted by a user in the community
Title : CommunityDisplayname
Body : userDisplayname reacted to your comment
Comment owner has a new Reply created by a user in the community.
Title : CommunityDisplayname
Body : userDisplayname replied to your comment
as default, all the event related to the Community feature has default context base on each event trigger, to customize the context for each event, you can access to Admin panel to do so.
The SDK has three levels of notifications and in order for it to be sent, a notification has to pass throughout all three levels.
Network Level: (via Admin Panel) turning off notifications at this level effectively disable push notifications altogether for all of your customers.
User Level: (via client) A user can choose to enable/disable the notifications that it receives on the device (this is an absolute option: enable all or disable all). Please note that this setting is per user, not per device: regardless of which device sets this toggle, the new preference will take effect in all the devices where the user is logged in.
Community Level: (via client) A user can choose to enable/disable notifications for a specific community (where is member of). Again, this preference is per user, not per device.
please note that if the Network level has been disable , the event in the User level AND Community level will be disabled as well.
The first step of receiving the Push notification is start with the following step
FCM dependency:
Before you can start receiving push notifications, you need to obtain a FCM unique token string that identifies each FCM client app instance:
You can initialize the services with the obtained token. Please note that the FCM token can be changed through application life cycle. Please make sure that the FCM token supplied to the messaging SDK is up to date. To notify the messaging SDK of the latest token, the following line of code can be called whenever necessary:
Since Google play services are banned in China, The messaging SDK provides Baidu push services as a substitute for FCM. The messaging SDK requires an api key and a secret key from Baidu:
Baidu dependency:
Note: Baidu push services require number of additional permissions. You can find a list of permissions here.
Baidu API key is needed for Baidu push services initialization:
Note: The messaging SDK always consider FCM as a primary push provider and Baidu as a secondary push provider. If the messaging SDK detects Google play services on the device, Baidu push services won't be initialized.
The registration will automatically pick up the active userId, and Amity's back-end will start sending push notifications to the particular user. In the where the active userId has been changed, registration will be required again.
Registering your app for push notification will require a registered EkoClient instance (necessary to know which user is associated with this device) and a push notification token.
Amity's Development Kit does not manage:
user-facing requests for push notifications and authorizations
the creation and refreshing of push notification tokens
It's up to your app to take those steps and pass the notification token to the SDK.
We recommend to observe the completion block outcome to assure of a successful registration.
If the device was previously registered with this or another user, the previous registration is invalidated as soon as this new request is received, which means that the device will always receive notifications of up to one user.
For community preferences we use the EkoCommunityRepository, obtained via instance of EkoCommunityRepository :
For user preferences we use the EkoClient, obtained via instance of EkoClient :
Unlike the registration, unregistering for push does not require the EkoClient instance to be associated with any user, therefore you can unregister the device from receiving push notifications as soon as the EkoClient has been initial
Plug in this module to enable social features such as Feeds, Groups, Profiles, Content Posts, and Social Media Type Interactions
Foster a sense of belonging among your community and make your app a safe place for your users to connect and interact with others.
When an error is returned as a result of an action from your side (e.g. trying to join a channel), the action can considered complete, and the SDK will not execute any additional logic.
We recommend you to always handle these errors in a production app by gracefully disabling messaging functionality in the event of an error.
This page contains an overview of all relevant changes made to the Amity Social SDK modules and the latest version releases
Eko Messaging SDK 4.8.0 is released.
None
Set turn on and off push notification as user level by .setAllowed(allowed: Boolean)
Get push notification setting values as user level by .isAllowed(): Single<Boolean>
None
None
OKHTTP - 3.10.0
Retrofit - 2.4.0
Kotlin-std-lib - 1.3.72
Eko Messaging SDK 4.7.1 is released.
None
None
None
Optimize PagedList configuration
Fix incorrect pagination of categories
None
OKHTTP - 3.10.0
Retrofit - 2.4.0
Kotlin-std-lib - 1.3.72
Eko Messaging SDK 4.7.0 is released.
None
None
None
None
OKHTTP - 3.10.0
Retrofit - 2.4.0
Kotlin-std-lib - 1.3.72
Eko Messaging SDK 4.6.0 is released.
Change query option setIsLive(isLive: Boolean) to setStatus(statuses: Array) in EkoStreamQuery.Builder. The user is now able to query live-stream videos based on its statues.
Query memberships by role. .role(role: String)
ImprovegetMyReactions()performance on EkoMessage, EkoPost
, EkoComment
None
OKHTTP - 3.10.0
Retrofit - 2.4.0
Kotlin-std-lib - 1.3.72
Eko Messaging SDK 4.5.1 is released.
None
None
None
Active user missing from community list when community has more than 10 members
None
OKHTTP - 3.10.0
Retrofit - 2.4.0
Kotlin-std-lib - 1.3.72
Eko Messaging SDK 4.5.0 is released.
Add query option setIsLive(boolean) in EkoStreamQuery.Builder. The user is now able to query currently live or ended live-stream videos.
Add new method getRecordings() in EkoStream model . The user is now able to get recorded videos.
None
None
None
None
OKHTTP - 3.10.0
Retrofit - 2.4.0
Kotlin-std-lib - 1.3.72
Eko Messaging SDK 4.4.2 is released.
Comment in FAILEDstate can be hard deleted by deleteComment(commentId)API
Post deletion by deletePost(postId)API results in hard deletion of the post from Global feed ranking
Fixed incorrect behaviour of private community query.
Eko Messaging SDK 4.4.1 is released.
Comment isDeleted property to be updated after initial query.
Eko Messaging SDK 4.4.0 is released.
Aligning file related message data return type with Feedfeature,
Replacing getUrl() : Stringwith getImage() : EkoImageinEkoMessage.Data.IMAGE
Replacing getUrl() : Stringwith getFile() : EkoFileinEkoMessage.Data.FILE
Eko Messaging SDK 4.2.0 is released.
Add Feed feature. Refer to Feeddocumentation.
Eko Messaging SDK 4.0.0 is released.
Add Comment on content feature
Revise all existing APIs . See each feature documentation for more info.
All the errors returned by the SDK come in form of an . The possible error codes are listed in a public enum: each case is named after its error and they are designed to be self explanatory.
You can convert an into enum with the following:
The class includes the method that can be called and observed to asynchronous errors. This observable object notifies you of errors that can potentially break the functionality of the SDK. The SDK logic is usually robust enough to automatically handle most errors, as such, only unrecoverable errors are exposed through this observable (for example, if the login session was invalidated).
Add push notification functionality to EkoCommunityRepository Refer to documentation.
Introduce eko-video-publisher for video broadcasting. Refer to documentation.
Add manual paging functionality to EkoCommentQueryRefer to documentation.
Add new option .roles(roles: List<String>) inEkoChannelMembershipQuery.Builder. Refer to documentation.
Add new option .sortBy(option: EkoCommentSortOption) in EkoCommentQuery.Builder. Refer to documentation.
Add new API getLatestComment() in EkoCommentRepository. Refer to documentation.
Add custom dataType support for EkoPost. Refer to documentation.
Error | Code |
BAD_REQUEST_ERROR | 400000 |
INVALID_REGULAR_EXPRESSION | 400001 |
UNAUTHORIZED_ERROR | 400100 |
FORBIDDEN_ERROR | 400300 |
PERMISSION_DENIED | 400301 |
USER_IS_MUTED | 400302 |
CHANNEL_IS_MUTED | 400303 |
USER_IS_BANNED | 400304 |
NUMBER_OF_MEMBER_EXCEED | 400305 |
EXEMPT_FROM_BAN | 400306 |
MAX_REPETITION_EXCEED | 400307 |
BAN_WORD_FOUND | 400308 |
LINK_NOT_ALLOWED | 400309 |
TOO_MANY_MEMBER_ERROR | 400310 |
RPC_RATE_LIMIT_ERROR | 400311 |
USER_IS_GLOBAL_BANNED | 400312 |
ITEM_NOT_FOUND | 400400 |
CONFLICT | 400900 |
BUSINESS_ERROR | 500000 |
Error | Code |
UNKNOWN | 800000 |
INVALID_PARAMETER | 800110 |
MALFORMED_DATA | 800130 |
FILE_SIZE_EXCEEDED | 800140 |
CONNECTION_ERROR | 800210 |
All data returned by the SDK are wrapped in the SDK's LiveObject API. The LiveObject API allows you to easily retrieve the queried data asynchronously, as well as subscribe to any new changes to the data.
Observing live changes to any object queries can be done by observing the dataUpdated event on the LiveObject:
In this example the block observes the data of the currently authenticated user and prints out the displayName. The observe block can be called multiple times throughout the lifetime of the application:
If the requested object data is stored locally on the device, the block will be called immediately with the local version of the data (you can verify this through the dataStatus property).
In parallel, a network request for the latest version of the data is fired. Once the network returns the data, the observe block will be called again with the updated data.
Any future changes to the data (whenever the user changes its displayName on another device, for example) can trigger additional callbacks.
We recommend you to always call removeAllListeners() whenever you are done observing event to avoid any unnecessary callbacks.
The data provided by LiveObject is directly accessible via the model property. The model property is always kept up to date with the latest state changes; every time when dataUpdated event is fired, the model property has already been updated.
If in your UI you want to exclusively display fresh data (without using the potientially out-of-date local data), you can do so by reading the object's dataStatus property, which reflects the status of the callback data, and check that its value is set to fresh.
You can also use the object's loadingStatus property to determine the current state of network operations being performed by the LiveObject. This is useful for any UI element that needs to provide the loading state.
The LiveObject can also emit events for updates for dataStatus as well as loadingStatus. As with other events, please make sure to call removeAllListeners() when you are done observing changes to these values in order to prevent memory leaks.
The LiveObject updates statuses and data in strict order and emits related events accordingly when an instance is created. Few different cases might occurs when you create a LiveObject instance:
Initial values:
loadingStatus = EkoLoadingStatus.Loading
dataStatus = EkoDataStatus.NotExist
model = undefined
Process received data:
emits loadingStatusChanged
emits dataStatusChanged
emits dataUpdated
Initial values:
loadingStatus = EkoLoadingStatus.Loading
dataStatus = EkoDataStatus.Local
model = localData
Process received data (same order):
emits loadingStatusChanged
emits dataStatusChanged
emits dataUpdated - only if data is really different
loadingStatus = EkoLoadingStatus.Loaded
dataStatus = EkoDataStatus.Fresh
model = localFreshData
The LiveObject API supports queries that return a list of objects, this is known as a LiveCollection. LiveCollection has the same methods and properties as its object counterpart, but contains a few other helper methods around pagination.
Pagination with LiveCollections is very simple: the collection offers a convenient nextPage method that you can call which will automatically trigger a local cache lookup, a network call, and multiple LiveObject updates once new data is returned. Every collection starts with one page of 20 models. After nextPage() is successful, the dataUpdated event will be triggered with a new array combining both the old objects as well as 20 newly fetched objects.
You can use the
hasMoreproperty to determine if you've scrolled to the end of the list. ThehasMoreproperty initially returns 'false' until the first collection query is finished.
Lastly, if there is a need to shrink the list of objects exported back to only the first 20 records (for example, if you pass the LiveCollection object to a new view), you can simply call resetPage().
Similar to model property of the LiveObject, the LiveCollection provides models property what is basically is an array of LiveObject's model objects. models is mutable and always contains same data as one what returned by dataUpdated event.
Both LiveObject and LiveCollection can be subscribed to the dataError event which is fired every time an error happens during the data update process. In other words, every time the LiveObject or LiveCollection fails to get data from the server - this error will be emmited.
We recommend you to always call dispose() whenever you are done working with any LiveObject/LiveCollection.
Dispose is a very important functionality of the LiveObject. It allows you to avoid memory leaks and keeps your application performant. What does dispose() do:
unsubscribe all listeners attached to the LiveObject instance;
stop all internall observers related to the LiveObject instance;
clean up an internall buffer of the LiveObject instance;
After you call dispose() on a LiveObject instance, dataStatus and loadingStatus switch to Error.
Before using the Social SDK, you will need to create a new SDK instance with your API key. Please find your account API key via the Admin Panel. If you have trouble finding this, you can send our support team an email at developer@amity.co
In order to use any Social SDK features, you must first register the current device with an userId. A registered device will be tied to the registered userId until the device is either proactively unregistered, or until the device has been inactive for over 90 days. A registered device will receive all the events messages belonging to the tied user.
An optional displayName can be provided, which will be used in standard push notifications (related to user's actions, such as when the new message is sent).
The
displayNameis set only on the first time the device is registered, please follow your platforms necessary directions if you would like to rename this to something else.
When the user logs out, you should explicitly unregister the user from the SDK as well. This prevents the current device from receiving unnecessary and/or restricted data.
Each user can be registered, at the same time, to an unlimited number of devices. Amity's Social SDK will automatically synchronize the user data across all registered devices. We will also automatically unregister any device that has not been connected to the server for more than 90 days.
When a device is unregistered due to inactivity, the SDK data on the device will be reset. You will need to re-register this device in order to connect to server again.
If you have any logic or UI around the connection status, you can observe the connectionStatus property on the EkoClient instance.
Since the SDK automatically manages the network connection and queue up any requests in cases of bad connection, there should be little need to attach additional logic to this status. However the user may want to know the exact network status to determine if their actions will be performed in real-time, therefore this status is exposed.
You can also be notified about connectionStatus changes via the connectionStatusChanged event.
Our Sample app adopts an open source framework that highlights how Amity Social Cloud SDK's can be implemented into application builds pragmatically.
With real life use-cases, we guide you through ways you can get started with building stellar applications for yourself and your clients and their users
Download the Web sample app
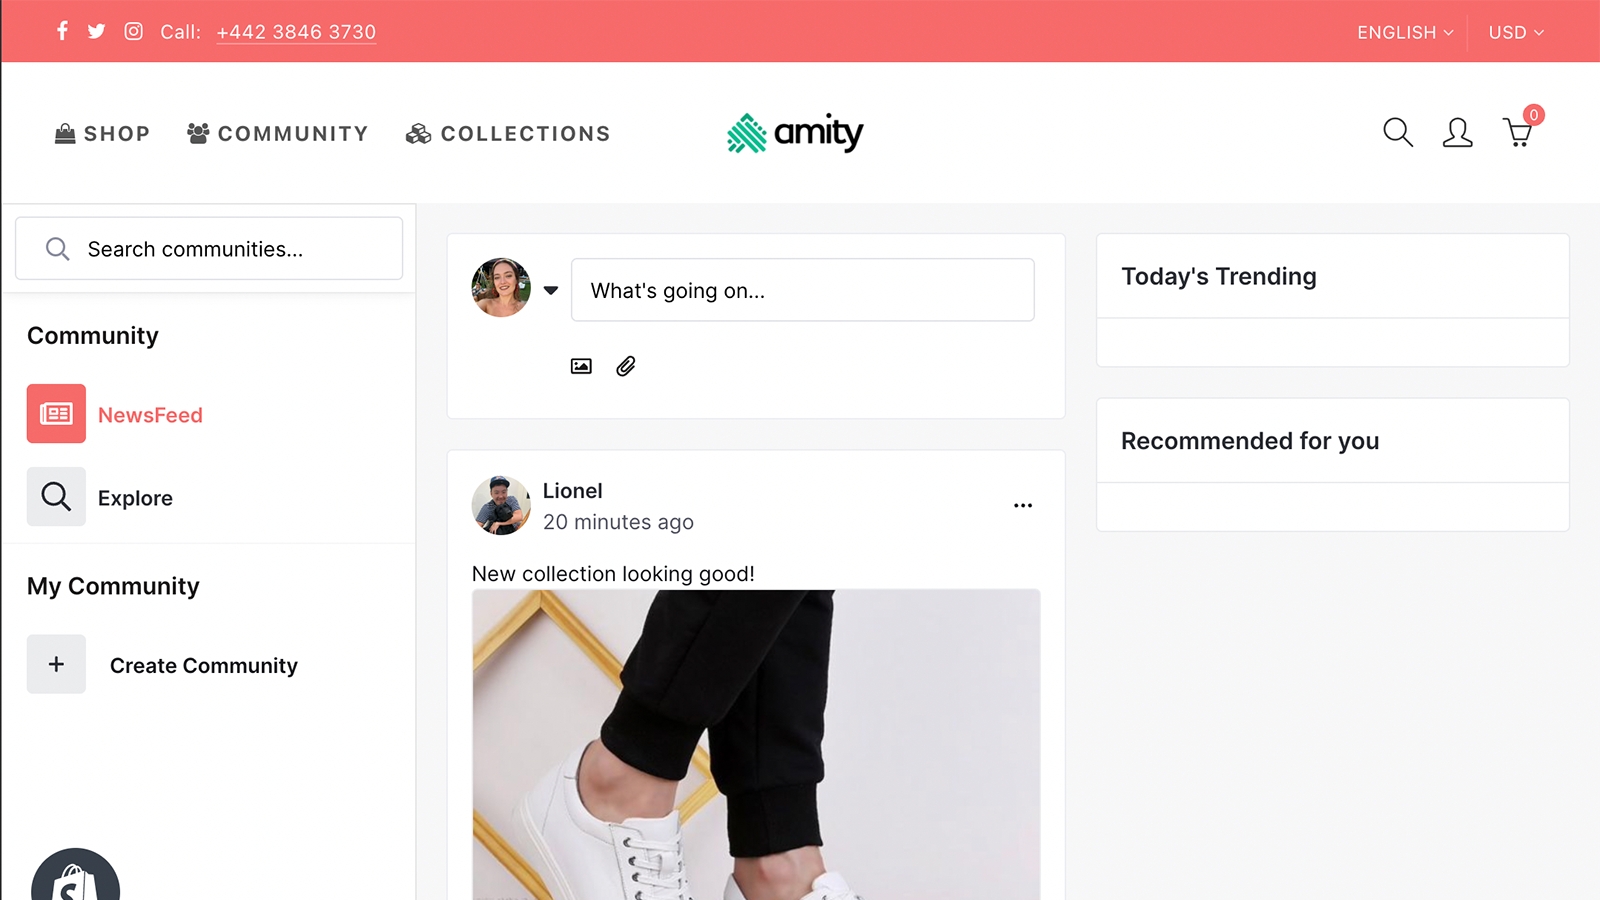
This page will guide you through the steps you need to take to integrate community chat groups into your applications for Web
When creating a new community, first instantiates the CommunnityRepository, a class that contain all community related methods. Then call createCommunity() to obtain the LiveObject and observe it in order to obtain the final community model.
Note that the event listener was registered using once(). Unlike on(), once() will automatically unregister the event listener once the first event was emitted. This is useful if you just need to use the model once but do not need to listen to further events.
In the case where you only want to fetch communities data without joining, you can use the communityForId() method:
There are methods to obtain communities that only match specific criteria:
the search parameter let you filter communities based on the community displayName
the isJoined parameter let you filter communities based on the logged in user membership status
the tags parameters let you filter communities based on the tags set (or not set) in each community
the categories parameters let you filter communities based on community categories
the sortBy parameters let you filter communities based on the order that the communities were created or based on alphabetical order
If you want to update a community, you can call the following:
Note. By default, only the communities original creator or adminstrators can update the community.
You can get a list of community members by calling the following method:
The CommunityRepository will also be able to manage community categories. When community are put into a category, you will be able to sort and filter each of the community in that category.
Note. Right now categories will only be creatable and updatable from the admin panel.
You can fetch a particular category by calling the categoryForId() method:
You can also fetch a list of categories:
This method provides the ability to obtain all the categories.
Let users react to messages, posts, and comments, which are visible to others.
This functionality is not currently supported for Web but will be coming soon! We will update the relevant sections accordingly
Here's an overview of how you can get started integrating comments into your applications
Comments are a way to create comments for a particular piece of content without needing to join a channel or manage channel memberships.
Amity Social SDK provides support for common text in comments.
All comment methods are contained in a CommentRepository class. Before calling any comment methods, you must ensure to import it.
All comment sending methods are designed to be robust enough to work under any network conditions. When you send any comment, that comment will automatically placed into a queue in case of unstable network conditions. Once the SDK reconnects to the server, it will automatically resend all queued comments.
Additionally, sent comments are always returned in comment queries, even before they have been delivered to the server. It is done to provide the user with a fluid commenting behavior: when a user sends a comment, that comment would appear in the comment list right away, instead of waiting until it has been confirmed by the server.
Unlike messages, comments are directly tied to a specific referenceId that is managed by the client. The referenceId has to be unique but can be any string.
Sending a standard text comment is a simple method, call referenceId and the message text:
To query for a list of comments in a post:
This method will return a LiveCollection of comments in the specified referenceId.
A comment can be a root for a thread. To query the children of a comment thread, you can add the parentId parameter in a comment query, along with the filterByParentId flag.
When creating a comment, we can also pass the parentId to make it appear under the parent.
To flag a comment, call the following method:
To unflag a comment, call the following method:
The User can also check if they have previously flagged the comment before by calling the following asynchronous method:
You can only perform edit and delete operations on your own comments. Once the operation is complete, the comment's editedAtDate will be set to the current time. This allows you to provide UI to the user to inform the user of specific messages that has been edited, if needed. An optional completion block can be provided to notify you of operation success.
Here's an overview of posts and how you can get started with integrating them into your applications
A feed is made up of a collection of posts. Users are able to generate different types of posts as well as to react and comment on posts.
When creating a text post, call the following method:
Note. A post can consist of either a list of images or a list of files but not both.
If text, image, and file types post are not enough for you. You can create your own type with whatever data you need for rendering. To do this, you need to call PostRepository.createPost and pass dataType, a string that defines the type of the post so you can distinguish your new post from others, and data, an object containing whatever data you need for your post.
You can use the postForId() method in order to get a single post:
Note. Only the post owner or an admin are able to update and/or delete a post.
As well as the general creation of posts, users are also able to interact with posts using the PostRepository. This repository's main purpose is to manage posts, reactions, and flags on a post.
You can add a reaction to a post by calling the following method:
You can also add a comment to a post using our Comment feature:
You can flag a post as inappropriate using the following method:
added error for comment live object when create new comment
fixed user reporting
Removed check for comments since post contains only comments without replies
recalculate comments counter for replies
clean in-memory cache when the session is reset
added user displayName to comments output
fixed crash of file uploading
force unix line ending for windows
added withCredentials() so the cookie gets saved
Allowed avatarCustomUrl to be passed to show avatars which are stored in the external systems
Added case insensitive community search
You can now create custom posts
PostRepository.createPost({ dataType: string, data: Object })
Comment
Fix the issue of fetching X comments with first / last sorting in CommentRepository.queryComments(parameters: Object)
Reaction
Normalized API accross the SDK
Post
PostRepository()
PostRepository.postForId(postId: string)
PostRepository.createPost(postType: string)
PostRepository.updatePost({ postId: string, data: Object })
async PostRepository.deletePost(postId: string)
async PostRepository.addReaction(postId: string)
async PostRepository.removeReaction(postId: string)
async PostRepository.flag(postId: string)
async PostRepository.unflag(postId: string)
async PostRepository.isFlaggedByMe(postId: string)
Comment
CommentRepository()
CommentRepository.queryComments(parameters: Object)
CommentRepository.commentForId(commentId: string)
CommentRepository.createComment(parameters: Object)
CommentRepository.editComment({ commentId: string, data: Object })
async CommentRepository.deleteComment(commentId: string)
async CommentRepository.addReaction(commentId: string)
async CommentRepository.removeReaction(commentId: string)
async CommentRepository.flag(commentId: string)
async CommentRepository.unflag(commentId: string)
async CommentRepository.isFlaggedByMe(commentId: string)
User
UserRepository.getAllUsers(sortBy?: EkoUserSortingMethod)
UserRepository.searchUserByDisplayName(search: string)
Error objects can be returned to you via LiveObjects, callbacks, or from the error event emitted by the EkoClient instance. The possible error codes are listed in a public ErrorCode object: each case is named after its error and they're pretty self explanatory.
UnauthorizedError: 400100
ItemNotFound: 400400
BadRequestError: 400000
Conflict: 400900
ForbiddenError: 400300
PermissionDenied: 400301
UserIsMuted: 400302
ChannelIsMuted: 400303
UserIsBanned: 400304
NumberOfMemberExceed: 400305
ExemptFromBan: 400306
MaxRepetitionExceed: 400307
BanWordFound: 400308
LinkNotAllowed: 400309
BusinessError: 500000
Unknown: 800000
InvalidParameter: 800110
MalformedData: 800130
ErrorQueryInProgress: 800170
ConnectionError: 800210
When an error is returned as a result of an action from your side (e.g. trying to join a channel), the action is considered completed and the SDK will not execute any additional logic.
The EkoClient emits a dataError event that can be observed by your application. This error event gives you a chance to be notified of errors that can potentially break the functionality of the SDK. The SDK logic is usually robust enough to automatically handle most errors, as such, only unrecoverable errors are exposed through this delegate (for example, if the login session was invalidated).
We recommend you to always handle these errors in a production app by gracefully disabling messaging functionality in the event of an error.
Ensure that your users don’t miss important content from each other.
This functionality is not currently supported for Web but will be coming soon! We will update the relevant sections accordingly
Let your users showcase their unique personality right in their timelines
Feed is a new way for users to create content on various areas of the SDK. Currently, users and groups can have feeds. Each feed consists of a collection of posts. Users are able to create posts on any groups that they are a member of and any user that they can find.
There is a global feed which is an aggregate of all the posts in a user's feed.
Feed management methods are all contained in a FeedRepository class.
You can get any user's feed by calling the method below with the userId:
There is a quick easy method to get your own feed:
You can get any group's feed by calling the method below with the communityId:
You can retrieve your global feed by calling the following method:
Plug in this module to enable social features such as Feeds, Groups, Profiles, Content Posts, and Social Media Type Interactions
Amity Social can be easily integrated into your Shopify store through Shopify App Store. This will enable your store to have your own social media community that allows customers and brand followers to view and posts content, therefore helping you increase engagement with your brands.
This feature is currently under beta release - the feature might be changed in backward-incompatible ways and is not subject to any SLA or deprecation policy.
Once the app is installed, your community page will be available at /a/community link. To make this available to all customers, go to your Theme Editor and add the link into your navigation menu.
You can also customize theme color of your community by adding primaryColor parameter into the /a/community link. For example if your store's theme color is F76A69 you may change your link to /a/community?primaryColor=F76A69.
Visit your community through the navigation link - you should be able to view and post to your community:
Amity Social SDK allows engineers to integrate social communities and user feed capabilities without the hassle of deploying and maintaining any server infrastructure. Companies can now build user-powered social news feeds and notifications into their mobile and web app in no-time. Enabling you to engage your customers with the same tools used by many of the popular social applications.
Let users create engaging content and engage with others through comments and reactions. Users can follow other users or topics, and become members of various groups to get a personalized timeline of content.
Activity feeds are also a great feature to directly engage with users. You can communicate with your users directly by posting important messages as announcements.
Amity social SDK allows you to:
Connect users through formation of communities
Boost user engagement by user generated posts / comments in communities
Personalize the feed based on user’s membership to different groups and communities
React to user generated content with our reaction tools
Enable comments on posts within your application, seamlessly
Support multiple messaging formats when posting content
Manage & moderate communities and users in admin panel
Filter out content that includes profanity using our auto-block tools
Assign roles and permissions on a role-based system
Here's an overview of how you can get started integrating comments into your applications
Here's an overview of posts and how you can get started with integrating them into your applications
This page will guide you through the steps you need to take to integrate community chat groups into your applications for Android
Let users react to messages, posts, and comments, which are visible to others.
Let your users showcase their unique personality right in their timelines
Ensure that your users don’t miss important content from each other.
This page contains an overview of all relevant changes made to the Amity Social SDK modules and the latest version releases